Showing posts with label cake. Show all posts

Friday, July 28, 2017

Strawberries & Cream Icebox Cake

Strawberries & Cream Icebox Cake

Just four ingredients make this cake a real treat, in more ways than one. Fresh strawberries combine with rich sweetened condensed milk and cake for a delicious dessert. The necessary make-ahead prep makes it perfect to take along for picnics and summer parties.

Strawberries & Cream Icebox Cake

Hands-On Time: 15 minutes
Ready In: 9 Hours
Serves: 12

Ingredients:

1 boxed white cake mix
12 ounces fresh strawberries
1 can (14 ounces) sweetened condensed milk
1 tub (16 ounces) frozen whipped topping - thawed


Directions:

1. Bake cake in a 9x13 pan according to directions. Cool.
2. Poke holes in cake with a wooden spoon handle or clean chopstick.
3. Pour contents of condensed milk can over cake.
4. Wash strawberries and hull. Slice over top of cake.
5. Cover cake and refrigerate for 8 hours or overnight.
6. Remove cake from refrigerator and top with whipped topping.

Monday, July 10, 2017

Lime Angel Food Cake with Raspberry Sauce

Lime Angel Food Cake with Raspberry Sauce

Fluffy Angel Food Cake takes on a new twist with the addition of lime juice and zest. Paired with a simple raspberry sauce, this cake is at once delicate and decadent and altogether perfect for a lighter summertime dessert. The calorie count makes this even more desirable with most slices (one twelfth of a cake) coming it at around 170 calories.

Lime Angel Food Cake with Raspberry Sauce

Hands-On Time: 15 minutes
Ready In: 60 minutes (including cooling time)
Serves: 12

Ingredients:

10 -12 large egg whites (about 1 1/2 cups)
2 teaspoons lime juice
1 cup granulated sugar
1 Tablespoon lime zest
1 cup all-purpose flour
1 1/2 cups powdered sugar


Directions:

1. Preheat oven to 350 degrees F.
2. Sift together flour and powdered sugar. Set aside.
3. Combine egg whites and lime juice in a large bowl. Beat until soft peaks form.
4. Stir together granulated sugar and lime zest. Add by the tablespoon to egg whites and
continue to beat, adding until all sugar is gone, until stiff peaks form.
5. Fold flour and powdered sugar into stiff-beaten egg whites in four small additions.
6. Turn out into an ungreased 10-inch tube pan.
7. Bake for 40 - 45 minutes or until top springs back when touched lightly.
8. Turn pan over and cool with cake still inside pan. Cool completely.
9. Remove from pan gently and serve with Raspberry Sauce.


Raspberry Sauce

Hands-On Time: 1 minute
Ready In: 1 minute
Serves: Makes 1 1/2 cups

Ingredients:

1 1/2 cups seedless red raspberry preserves
2 Tablespoons lime juice

Directions:

1. Microwave preserves for 30 seconds until warm. This may take more or less time
depending on your
microwave.
2. Stir well until smooth.
3. Add lime juice and stir until well combined.


Tuesday, October 07, 2014

Apple Cakey Pie Thing Gooey Goodness

Apple Cakey Pie Thing Gooey Goodness

A couple weeks ago I came across a cake on a site (thanks to Mark Boxshus, A.K.A. Boscoe the Cookie Doctor) and thought it looked awesome, but there was no way it would work. I also thought it would be awesome with a topping like the one we use for Nana's Apple Cake.


I had no idea how this monster of a thing would turn out so I tried it. I tweaked it here and there and made it several times before I was happy with it. Just the photos alone on Facebook and Instagram stirred people.

When I posted to Instagram I called it: "Apple cakey pie thing gooey goodness" and SoVeryDomestic remarked, "That should really be the official name." So, I obliged and here we are. 


The first time I made it several of the kids said it was the best apple pie they ever had. It's not quite a pie, though, so we called it "pie cake". The inside seems to be almost not fully done, but it is - we struggled to find the right words for the consistency and realized it's almost like the texture you get when you let ice cream melt on your warm crumb-topped pie. It's really wonderful.


Apple Cakey Pie Thing Gooey Goodness

Apple Cakey Pie Thing Gooey Goodness
Serves 10-12
Printable Recipe

Ingredients:

Crust and topping:

2 sticks butter (1 cup) cut into small pieces
2 cups all-purpose flour
1 cup packed light brown sugar
1 teaspoon ground cinnamon


Filling:

12 small or 8 large Granny Smith apples - peeled and thinly sliced
1/2 cup packed light brown sugar
1/2 teaspoon ground cinnamon

Cake:

1/3 cup butter
1/2 cup white sugar
1 egg
1/2 cup milk
1 teaspoon vanilla extract
1 cup flour
1 teaspoon baking powder

Directions:
Preheat oven to 350 degrees F

1. Combine crust and topping ingredients: Stir together flour, sugar and cinnamon - rub into butter until crumbly. Set aside 1/3 of this and press the rest into a 10-inch springform pan. Cover the bottom and press part way up the sides - about 1/2 an inch up.

2. Combine apples and brown sugar with cinnamon. Toss well to coat. Pour into crust. This should come up to the top and possibly slightly over.

3. Stir together cake ingredients: Melt butter and stir in sugar and vanilla. Add milk and egg and blend well. Stir in flour and baking powder. Pour over top of apples and tap to help it cover over the apples well.

4. Crumble the rest of the topping across the cake and set on a baking sheet.

5. Bake for 1 hour and 20 minutes or until browned on top and bubbly at the edge.

6. Let cool well (about an hour) and run a knife around the edge. Slice now if you wish or remove ring and cut into 10-12 pieces.

Friday, May 10, 2013

Red Velvet Truffles


Red Velvet Truffles
Red Velvet Truffles

Red velvet cake isn't anything new and neither are red velvet truffles, but I had to make these anyway. I started out a couple weeks ago attempting to make a version that was a riff on the Cookie Dough Bites I made for Disney (see Family.com or Spoonful.com for the recipe), adding cocoa powder and red food coloring, but the result was less than desirable and too heavy.

I went back to the drawing board, read other recipes and then, as usual, did my own thing. These truffles are truly delicious. They aren't heavy and aren't too sweet. The white chocolate surrounding them is the perfect complement to the rich centers.

I first thought of doing the usual crumbled cake and icing, but I felt it would be too sweet. I went with straight up cream cheese and then tried the "dough" once it was together. I was skeptical and wrestled with myself about adding powdered sugar. I'm really glad I didn't.

I also didn't use the usual white coating or white chocolate chips that can sometimes be cloyingly sweet. I instead went with Ghirardelli white chocolate baking bars and the end result was exactly what I was looking for; a rich center that wasn't too sweet or heavy surrounded by a creamy smooth exterior. I'm not specifying a box size for the cake or a recipe for red velvet because most people have their own favorite brands and/or recipe.

I didn't add extra red food coloring, I think the usual color of red velvet is pretty enough and with the off-white of the baking bar the truffles are very classy.

Completely crumbed cake.

Cream cheese added to crumbs.

Baking chocolate bar.

Adding truffle to chocolate.


Perfectly dipped truffle.


Red Velvet Truffles
Printable Recipe
Hands-On Time: 25 minutes
Ready In: 1 hour 25 minutes
Makes: 36 truffles

Ingredients:

One 9x13 size red velvet cake - completely cooled
8 ounces cream cheese - softened to room temperature
4 bars white baking chocolate (16 ounces total)

Directions:

1. Crumble cake completely into a large bowl.
2. Add cream cheese and mix with hands until completely combined with no streaks of cheese showing.
3. Roll between palms into 1" balls and set on a cookie sheet until all are rolled.
4. Melt chocolate in a double boiler or in the microwave until smooth.
5. Dip truffles in melted chocolate and set back on cookie trays.
6. Let stand until hardened or put into freezer until set. Serve at room temperature.

Sunday, April 28, 2013

Simple Strawberry Cake

Strawberry Cake
Strawberry Cake

I feel I need to begin this post with a disclaimer, so I will. This cake is made with a boxed mix AND a boxed gelatin mix. So, there. If you have any arguments, feel free to dial up Tyler Florence who shared a recipe using a boxed mix in his book, Family Meal. Not only was that cake fabulous, but easy to make, and thus, more likely to be made.

This was made by request as a birthday cake, and perfect for this time of year. Because it's so easy to make but so pretty in presentation it's good for every day or to serve to company. This would also be a beautiful addition to any Mother's Day table.

Any boxed yellow cake will do and any brand of gelatin, as well. Just use the sizes recommended for best results.

Strawberry Cake
Printable Recipe
Hands-On Time: 15 minutes
Ready In: 1 hour 45 minutes (includes cooling time)
Serves: 8-10

Ingredients:

1 quart ripe strawberries, washed and hulled - leaving one with the stem and leaves
One yellow cake mix (18.25 ounces)
One strawberry gelatin mix (3 ounces)
2 cups heavy cream
1/4 cup powdered sugar

Directions:

1. Slice all but one strawberry thinly and set aside. Slice one strawberry from end to stem being careful not to cut all the way through. Leaving stem attached, fan out berry and set aside.
2. Blend cake mix as directed on box and place half of batter in another bowl. Mix gelatin into one half of batter.
3. Pour plain batter evenly into two 9-inch round cake pans. Add strawberry batter to top and swirl with a spoon or fork. Bake as directed on box.
4. Cool cakes completely once baked and remove from pans.
5. Add powdered sugar to heavy cream and beat until fluffy.
6. Set one cake on a plate and top with half the whipped cream and half the strawberries.
7. Add second cake layer and whipped cream. Arrange strawberries in concentric circles from center out. Add berry with leaves to the center.

Wednesday, May 02, 2012

Easy Decoration and Yummy Cake


It's no secret around here that my cake decoration skills are sub-par. Actually, they're flat out bad. So, any chance for me to make a cake look good without too much effort is perfect for me - and for those being subjected to my "skills". The kids always love cakes made by mom, but even they have to admit to them being not exactly nice to look at.

This cake topping is not only so very pretty, but also so very easy. Start with any type of berry you like (save the strawberries for a large sheet cake) and add fresh mint leaves. That's it. A white background makes it more dramatic, but I imagine any lighter colored icing would do.

Arrange them first on a surface the same size as your finished cake so you can rearrange as needed to get the right look. Dusting with powdered sugar adds a nice touch, as well. I like the contrast of dark berries and green leaves, but red berries would be equally pretty.

Now, to this cake. This one is simple to throw together, dense and moist in texture and not too sweet. It reminds me of a pound cake and, as such, goes well with a variety of toppings, but I find the lighter frosting I've included to be the perfect complement to heavier icings.


Sour Cream Cake and Cream Cheese Frosting
Makes one 8x8 square cake
Printable Recipe

1 stick unsalted butter
1/4 teaspoon salt
1 cup granulated sugar
1 teaspoon vanilla extract
2 large eggs
1/4 cup sour cream
1 1/2 cups cake flour
1/4 teaspoon baking soda
1/4 teaspoon baking powder

Heat oven to 350 degrees F. Grease and add parchment paper to an 8x8 square baking pan. Set aside.

Cut butter into small pieces and combine with sugar. Beat with a hand mixer until light. Add vanilla and eggs, one at a time, until well blended. Stir in sour cream. Add flour, salt, soda and powder. Blend well until smooth. Batter will be thick.

Smooth batter into pan and bake for 30 minutes or until a toothpick inserted in the center comes out clean. Let cool completely and turn out onto a serving platter, bottom side up.

Mix frosting:

4 ounces cream cheese
1 cup heavy cream
1/4 cup powdered sugar

(Note: if you like you can use non-dairy whipped topping in lieu of the cream and sugar.)

Soften cream cheese and beat until smooth. Beat heavy cream with powdered sugar until cream forms stiff peaks. Fold into cream cheese until smooth. Spread on cooled cake and add berries and mint in desired pattern.

Tuesday, March 20, 2012

Funny Cake

Funny Cake


Once in a while someone comes along and reminds me about a food I've eaten in the past that I completely forgot about. Such was the case not too long ago when I was reminded of funny cake and I decided to take that memory and augment a little.


When I was a young child in the 70s my mother went through a phase where she would purchase milk and eggs from a delivery truck. I couldn't  remember who the older man was that delivered those items in his step van, but I'll never forget his visits.

I would sit out on the front stoop of our home on Linden Street in Bethlehem with my stepdad and wait paitently for the truck to come. Mom would sometimes be with us, and she was always the purchaser, but my step-father and I were the watching committee. As soon as the truck would roll down the hill, if she wasn't there already, we would call for mom.

She always bought eggs and milk, but some weeks there would be extras. A tin of potato chips, a bag of pretzels, a wet-bottomed shoo-fly pie for my step-dad and, not often enough, a funny cake for my brothers and me. We'd devour it in one sitting and wish for more.

Mom never made shoo-fly or funny cake; I think it may have been something she considered an Amish secret, shrouded in mystery and not to be uncovered by mere "English" (what the Amish call the rest off us) people. Or she just may not have had a recipe.

Funny Cake

Once I was older I discovered recipes for both. My first time with shoo-fly pie was disaster. Pie filling puffed up and dripped out of the pies and into the bottom of the oven. Blackened molasses is like no other odor in the world. Funny cake was made now and then, but not often enough - just the way mom bought them. In fact, I don't think my kids would recognize one if they were introduced to it.

I called mom to inquire about the deliveries and the man who made them and she told me that all she remembered was his last name: Fegely.  After a quick search on the internet for milk deliveries in the Lehigh Valley by a Fegely, I came across Howard Fegely, owner of Fegely's Dairy and founder of Limeport Stadium. I have no idea if the man who delivered our milk was related to the dairy Fegely's, but I did try my best to find out and turned up empty-handed.

No matter, I made funny cake for the kids and they did exactly as expected; they devoured it in no time because some memories are just more delicious than others.

Funny Cake


Funny Cake
Makes one 9-inch "cake"
Printable Recipe

1 - 9" unbaked pie crust
1 cup granulated sugar
1 large egg - beaten
1/4 cup butter or shortening (shortening or lard would be more traditional here)
1 cup flour
1/2 cup milk
1 teaspoon baking powder
1/2 teaspoon vanilla extract

Preheat oven to 350 degrees F.
Cream butter or shortening with sugar until fluffy and add egg. Blend well. Add remaining ingredients and pour into a 9-inch unbaked pie shell.

1/2 cup granulated sugar
6 Tablespoons hot water
4 Tablespoons cocoa powder
1/4 teaspoon vanilla extract

Blend these together and pour over the first part in the shell. Bake for 35 minutes or until a toothpick inserted in the center of the cake comes out clean. While baking the chocolate settles underneath the vanilla part and makes a gooey chocolate layer.



Monday, January 24, 2011

Almond Cake


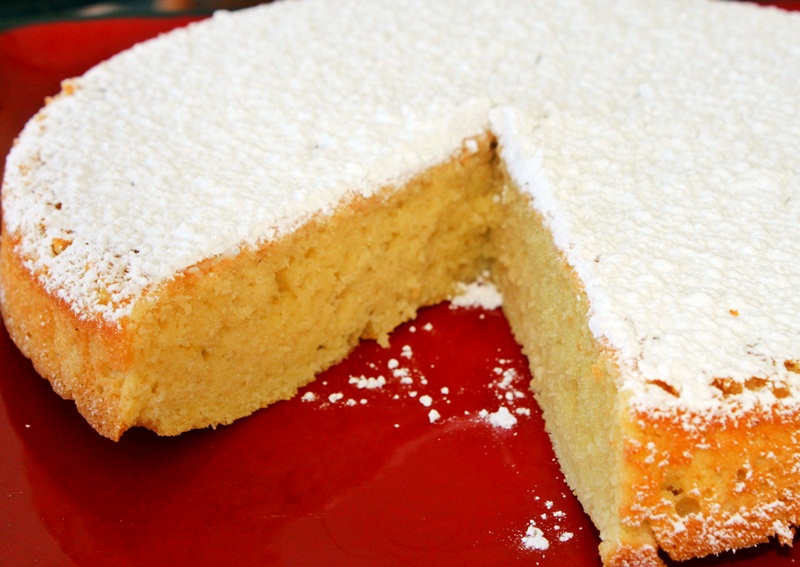
Moist and rich in almond flavor, this is the perfect ending to any meal. Dust with powdered sugar, sliced almonds or even a chocolate sauce for an extra delicious dessert.

Almond Cake
Hands-On Time: 5 minutes
Total Time: 35 minutes
Serves: 8
Printable Recipe

Ingredients:

1 cup all-purpose flour
1 teaspoon baking powder
1/4 cup almond paste
1 1/2 sticks (6 ounces) unsalted butter - softened
1/2 cup granulated sugar
1/2 teaspoon vanilla extract
4 large eggs
1/4 cup powdered sugar

Directions:

1. Preheat oven to 350 degrees F. Grease an 8-inch round cake pan.
2. Combine flour and baking powder and set aside.
3. Mix together almond paste and butter until smooth. Add sugar and beat until fluffy.
4. Add eggs and vanilla extra and beat until well combined. Add flour mixture until just blended.
5. Pour into prepared pan and bake for 30 minutes or until the top springs back when touched in the center.
6. Cool in pan for 5 minutes then turn out onto a rack to finish cooling. Sprinkle with powdered sugar.

While you're here check out Sweets for Saturday at Sweet as Sugar Cookies. Sweetness overload you won't want to miss!

Wednesday, December 22, 2010

Lucky Leaf Pot-A-Cakes


I admit to being a baker who uses canned pie filling. It's not anything I'm ashamed of, on the contrary, I think it makes me a smarter baker. While fresh cherry pie is lovely, pitting cherries is not, and while fresh blueberries are the bomb, some days I just need them ready to go. I will admit that using apple pie filling from a can is something you'll almost never see me do, but I've slipped there on occasion, too.

Lucky Leaf recently sent along a few recipes for me to try along with cans of their pie fillings to make them with. The first was a clear winner in our house. Lucky Leaf Pot-A-Cakes was the Grand-Prize Winner of the Lucky Leaf Blue Ribbon Recipe challenge, submitted by Gloria Herdman of Pomeroy, Ohio. A combination of streusel bread, blueberry pie filling and cheesecake, they were absolutely yummy.

Pot-A-Cakes

Ingredients

1 21-ounce can LUCKY LEAF ® Premium Blueberry Pie Filling
1 8-ounce package cream cheese, softened
1 4-serving size package (3.4 ounces) French vanilla instant pudding mix
1 1/3 cups whipping cream
1 17.4- to 18.3-ounce package cinnamon streusel quick bread mix
2/3 cup water
2 eggs
2 tablespoons vegetable oil

Preparation

1. Preheat oven to 350°F. Divide pie filling among eight 10-ounce custard cups or ramekins (for one dish recipe see below). Set cups on a large baking sheet; set aside.
2. In a large bowl beat cream cheese with an electric mixer on medium speed until smooth. Beat in pudding mix. Gradually beat in whipping cream until well combined (mixture will be thick). Spoon evenly over pie filling in cups.
3. In another large bowl combine quick bread mix, water, eggs, and oil. Stir until combined but slightly lumpy. Spoon 1/4 cup of the batter over the cream cheese mixture in each cup. Sprinkle evenly with all but 1/4 cup of the packaged streusel mixture. Spoon remaining batter over the streusel (batter won't cover the streusel layer). Sprinkle with reserved streusel. (Note: Cups will be full.)
4. Bake for 25 to 30 minutes or until tops are golden brown and a toothpick inserted into top portion comes out clean. Cool slightly. If desired, drizzle tops of cakes with icing* before serving. Serve warm.

*Icing: If your quick bread does not contain an icing packet, in a small bowl combine 3/4 cup powdered sugar, 2 teaspoons milk, and 1/4 teaspoon vanilla. If necessary, stir in additional milk, 1 teaspoon at a time, to make drizzling consistency.

One Dish Method: Prepare batters as above. Spread pie filling in a 3-quart rectangular baking dish. Dollop pudding mixture atop. Spoon on about 1/2 of the batter and sprinkle with all but 1/4 cup of the streusel. Spoon on remaining batter and sprinkle with reserved streusel. Bake in a 350°F for 40 minutes. Cool slightly and drizzle with icing.

Servings: 8

Cooking Time: 25 minutes


Lucky Leaf products provided free of charge. This post and resulting opinions are my own and have not be influenced by free product.

Monday, December 20, 2010

Sweet Potato Pound Cake with Dulce de Leche

Sweet Potato Pound Cake with Dulce de Leche
Leftovers are a fact of life, especially during the holidays. I'm a straight-up kind of girl when it comes to them so it's rare that I make anything different from a leftover holiday food. This cake, though, is something I'd make extra sweet potatoes for any day.

When this was done, still warm from the oven and topped with thick dulce de leche, the result was something that can really only be described as foodgasmic. There were no words for just how good that cake was. I made it again with the same delicious results and expect it to stand the test of time here.


Sweet Potato Pound Cake with Dulce de Leche
Serves: 12
Printable Recipe

Ingredients:

2 cups leftover mashed sweet potatoes
1 cup unsalted butter - softened
4 large eggs
1 teaspoon vanilla extract
1 cup granulated sugar
1 cup unpacked light brown sugar
3 1/4 cups all-purpose flour
1/4 cup milk
2 teaspoons baking powder
1/2 teaspoon baking soda
1/2 teaspoon salt
2 teaspoons pumpkin pie spice
2 cups prepared dulce de leche

1. Preheat oven to 350 degrees F. Grease a 12-cup bundt pan and set aside.
2. Mix together butter and sugars until light and fluffy. Add sweet potatoes, vanilla, eggs and milk and stir until smooth.
3. Combine flour, baking soda, baking powder, salt and pumpkin pie spice and add to wet ingredients slowly. Batter will be thick.
4. Spoon batter into prepared pan and bake for 55 to 60 minutes or until a toothpick inserted near the center comes out clean.
5. Cool for 10 minutes and invert onto a clean serving platter.
6. Heat dulce de leche until smooth and warm and serve over slices of cake.

*Notes: If you don't have pumpkin pie spice on-hand you can use 1 teaspoon ground cinnamon, 1/2 teaspoon ground ginger and 1/4 teaspoon each ground nutmeg and cloves.


Monday, April 26, 2010

Jersey Diner Coffee Cake


Jersey Diner Coffee Cake
I'm not sure where the title of this recipe came from, but if you've ever had an Entenmann's Ultimate Crumb Cake, this is nearly identical to it. Dense crumbs top a moist, buttery cake and the result is pure joy.

This uses a boxed cake mix and margarine - both taboo these days, it seems - but we so enjoy this cake that I make it with both anyway. There's no reason to eat a whole cake in one sitting, and if you stick to one piece (I dare you!), then you're not ruining your health completely.

I know I found this online somewhere about 11 years ago, but I didn't save that information and I'm clueless as to the author. There are different versions of this floating around, though, so I don't feel as if I'm stepping on any toes. Whoever you are, here's to your delicious creation.

Butter, Sugar and Vanilla
Look at all that butter, cinnamon, sugar and vanilla.


Jersey Diner Coffee Cake
Perfectly crumbed cake.


Jersey Diner Coffee Cake
Makes one 11x15 cake
Printable Recipe

1 pkg Duncan Hines Butter Cake mix (or any other brand)
4 large eggs
2/3 cup milk
2/3 cup vegetable oil

Preheat oven to 350 degrees F.
Blend together until lumps disappear - do not over mix.
Bake in a greased 11x15 jellyroll pan for 20-25 minutes.

Crumb Topping:

4 cups flour
2/3 cup sugar
2/3 cup packed light brown sugar
1 Tablespoon cinnamon
1 Tablespoon vanilla extract (I used Floridian Gourmet [see photograph] which is sadly out of business now, but his newest endeavor is HERE - this guy knows his stuff!) 
2 sticks of margarine
1 stick of butter

Melt butters and let cool slightly. Add vanilla.
Mix flour, cinnamon, sugars then add the liquid mixture.
Crumble with hands and place on warm cake. Bake again for 20 min at 350 degrees F.
Let cool and dust with powdered sugar.

Saturday, December 26, 2009

Christmas Cake


The top of this year's snowflake cake.

I think the first year I started blogging, which was 2005, I went into great detail about our Christmas celebrations and food. Not much changes from year to year in the department, but there are differences. Usually it's something one of the kids has requested or a recipe I caught from a magazine that I had to try. This year one of the desserts was something I haven't made for about 12 years - a snowflake cake.

I can't remember what magazine I found this beauty in, but I thought it was one of the prettiest cakes I've ever seen and had to tackle it. Back then I had 3 children and lots more time, so it wasn't so taxing to get it done. Over the years, as we added 4 more kids and lost some time I let it slide and intended to make it, but never got 'a round tuit'.

This year I wanted to make that cake come Hell or high water, and I did. I was amazed at how easily it went together and quietly scolded myself for not having done it earlier. It was a show stopper - as it was meant to be - and the cake itself was so good that my mother-in-law called (on behalf of my brother-in-law) to ask if we had any left.


My first snowflake cake from 1997.

The cake itself is one of my newest favorites, Dorie Greenspan's Perfect Party Cake, which I first made with the Daring Bakers almost 2 years ago. I have since come to love that cake and use it as a base for many, many desserts. This time I made 4 layers of the cake and sandwiched ALDI's Fruits of the Forest Spread between the layers (this spread is to-die-for and you must find an ALDI and seek this out) and topped the cake with a basic buttercream icing.

Once assembled, I piped 'snowflakes' (which were really more star-like because they have more than 6 sides) out of melted white chips and added pearlized dragées to them. I usually use silver or gold dragées, but they were hard to find this year.

Once the snowflakes are set, I add them in a pile to the top of the cake and sprinkle the whole top with large crystal sugar to give it extra sparkle. Give it a try sometime - it's a good cake for all winter long, not just Christmas.

What are the food traditions your family can't live without? What is something new you've tried this year?


Sunday, August 02, 2009

Cherry Upside-Down Cake

Cherry Upside-Down Cake
Cherries aren't one of my favorites, but they are for a few of the kids,  so I make cherry pies and turnovers for them. I love Bing cherries of the fresh variety, though, and I picked up some this past week.

Nobody seemed interested in them besides me, so I devised a yummy dessert in which to 'dispose' of them. Even I liked this, which is saying a lot as I really don't like cooked cherries in any form.

We like ours with a smaller cake, but the recipe doubles very easily if you'd like more cake-to-fruit ratio.

Cherry Upside-Down Cake
Makes One 10" round cake
Printable Recipe

1 1/2 cups all-purpose flour
1/2 cup granulated sugar
1 teaspoon baking powder
1 large egg - lightly beaten
1/2 cup + 2 Tablespoons butter - softened
1/4 cup light brown sugar - packed
1/2 teaspoon ground cinnamon
35 to 45 fresh cherries - pitted and halved

Heat oven to 375 degrees F. Melt 2 Tablespoons butter in a 10" round cake pan.
Place halved and pitted cherries, cut side up, into the bottom of the cake pan. Blend brown sugar and cinnamon and sprinkle over cherries. Set aside.
Cream together butter and sugar. Add egg and blend well. Stir together flour and baking powder and add to egg mixture. Drop evenly over top of cherries - this is a thick dough that can not be poured.
Bake for 30-35 minutes or until golden brown on top.
Remove from oven and cool for 5 minutes. Loosen edges and gently invert onto a large plate.

Sunday, February 22, 2009

Sunday Dinner: BBQ-Fried Chicken

This photo is one of the little one's plates - I always cut the tenders from the chicken breasts as they are easier for tiny hands to grasp.

This week's Sunday Dinner is a combination of things my family loves. Declan (our 9 year-old son) could probably live on barbecue sauce; he puts it on almost everything. The rest of the family is crazy about fried chicken so I put the two together and it was a hit.

I was able to find boneless, skinless chicken breasts at Valley Farm this week for $1.99 a pound - hard to beat these days - and along with homemade breadcrumbs (I never, ever buy them) from a leftover French batard I had, this was quite the frugal dinner.

BBQ-Fried Chicken
Smashed Potatoes

Steamed Broccoli

Carrot Cupcakes


BBQ-Fried Chicken
Serves 4
Printable Recipe

The larger crumb on these makes them crunchier but can be harder to work with. Be sure to press the breadcrumbs onto the chicken well before frying.

4 boneless skinless chicken breast halves - pounded or cut to even thickness
1/2 cup barbecue sauce
2 cups large-crumb breadcrumbs
salt and pepper to taste
oil for frying

Coat each chicken breast in barbecue sauce and then in breadcrumbs - pressing onto spots that are not covered. Fry in hot oil until golden brown on both sides - about 5 minutes each side. Drain well on paper toweling.


Smashed Potatoes
Serves 4
Printable Recipe

8 white or gold new potatoes - washed well
salt and pepper
olive oil

Cook potatoes in boiling water until just tender - about 15 - 20 minutes. Grease a baking sheet with olive oil and place potatoes on sheet - several inches apart. Gently press down on each potato until they flatten slightly but do not fall apart. Salt and pepper well. Bake in a 350 degree F oven for 10 minutes - turn over with tongs being careful to hold each potato together. Bake for another 10 minutes until browned well.

Saturday, November 29, 2008

Daring Bakers' Challenge: Caramel Cake with Caramelized Butter Frosting


This month's Daring Bakers' Challenge is hosted by Shuna Fish Lydon of Eggbeater with her Caramel Cake with Caramelized Butter Frosting, as published on Bay Area Bites - full recipe HERE. There was also an optional challenge: Golden Vanilla Bean Caramels from Pure Dessert by Alice Medrich, Artisan Press, Copyright 2007, ISBN: 978-1579652111.

Co-hosting with Shuna are Alex (Brownie of the Blondie and Brownie duo), Jenny of Foray into Food, and for the gluten-free options, Natalie of Gluten-a-Go-Go.

I decided to use the caramels as a decoration for my cake, and although we haven't eaten ours yet, the cake smelled so good when it was baking that I was having to hold the kids back. Caramel is one of my husband's favorite things and he can't wait to get his fork on this one!


I think it went together really easily, the cake baked perfectly and the icing was a real pleasure to work with. I can tell you that the caramels themselves are delightful.