Monday, December 05, 2016

Bolete Named One of 100 Best Restaurants in America by Open Table

It doesn't get any sweeter than this! This is no surprise to me at all, and it's not the first honor Bolete has received.


Chef Lee Chizmar’s Bolete Restaurant Named to ‘100 Best Restaurants in America’ by Open Table

Celebrated Chef to Co-Host Philadelphia’s Taste of the Nation in January

Bethlehem, Penn. (December 5, 2016)-- Chef Lee Chizmar’s Bolete Restaurant was named among the “100 Best Restaurants in America” for 2016 by Open Table last week, as the restaurant celebrates its ninth anniversary in Pennsylvania’s Lehigh Valley. Owners Chizmar and wife Erin Shea have made their mark on the Mid-Atlantic region by epitomizing farm-to-table freshness with their remarkable daily-changing menu guided by farmer relationships. This nod adds to the handful of high-ranking accolades they have been fortunate enough to receive from the dining reservation service since their opening.

Open Table lists that the awards showcase both long-running and new eateries and features restaurants in 30 states and the District of Columbia. Relative newcomers such as Le Coucou in New York, and Zahav in Philadelphia are among the winners, alongside notable spots like New York’s Gramercy Tavern and Philly’s Vetri.

Having been named to Conde Nast Traveler’s “100 Hottest New Restaurant” upon opening in 2008, Bolete continues to root itself in providing great hospitality and dynamic food. Everything is made fresh in the Bolete kitchen, including stocks, sauces and pastas. Earlier this fall, Chef Chizmar returned for a fifth year to headline the wildly popular open-air feast, Outstanding in the Field, teaming up with Blooming Glen Farm to present guests with a dinner ripe with farm-fresh provisions. Next month, Chizmar will co-host Share Our Strength’s annual Taste of the Nation in Philadelphia, guiding over two dozen chefs to help end childhood hunger in the United States.

In addition to their revered Bethlehem restaurant, Chizmar and Shea launched a new “farm-to-stick” ramen noodle bar, Mister Lee’s Noodles, in nearby Easton, Penn., earlier this year. It offers a fun, nontraditional take on the popular Japanese staple, sourcing ingredients from local farms to make each dish to order on site. As the first premium ramen concept to come to the Valley, Mister Lee’s has earned accolades from the community and sparked interest from main stage foodies, such as the New York City Wine & Food Festival, where Chef Lee did a pop-up in October to present one of his ramen dishes at their “Harvest Party”.

Chizmar, a graduate of the Culinary Institute of America, developed an appreciation for seasonal, local ingredients at Lark Creek Inn in San Francisco with Chef Bradley Ogden. He then moved to Boston for the opening of Great Bay, under the tutelage of owner Christopher Myers, which was quickly named Best New Restaurant in the Country by Esquire Magazine. It was there that Chizmar and Shea met, and so began their journey of creating one of the country’s future institutions in dining.

Bolete is housed in a historic stagecoach inn at 1740 Seidersville Road in Bethlehem, Penn., and was designed to be special place where guests are often greeted by Shea herself and can savor fine tastes in an elegant, unhurried atmosphere. Follow them online @eatbolete on Facebook and Instagram. For more information, call 610-868-6505 or visit www.boleterestaurant.com. Mister Lee’s Noodles is located at the Easton Public Market, 325 Northampton Street in Easton, Penn., and can be reached at 610-829-2799 or online @misterleesndls and www.misterleesnoodles.com.

Monday, November 21, 2016

Bake it Better with Miss Jones Challenge

What inspires you to bake during the holidays? Bake up a treat of your choice using Miss Jones baking mix and/or frosting, and they will donate $1 to the SF-Marin Food Bank. Just use the hashtag #betterwithmissjones on social media or visit their website for more info at www.missjones.co/better. Your creativity is the secret ingredient! Great ideas could include candy cane Christmas cookies, maple cheesecake brownies, chocolate cake waffles, or any other tasty treats you can conjure. Miss Jones also offers tons of inspiration online at https://www.missjones.co/.  Now, go check it out and get entered to WIN!

It's that time of year again - Baking Season! I was recently introduced to Miss Jones Baking Co. and I want to share them with you, too! Not only are their baking mixes and frostings totally delicious, they're certified organic, non-GMO, plant-based, responsibly sourced, and contain no artificial colors or flavors. That's serious baking firepower! Check out what I made with the mixes I received:

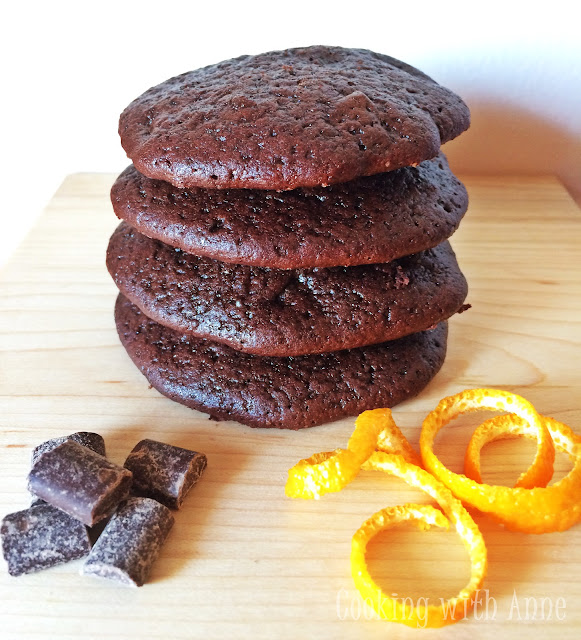
Chocolate Chunk Orange and Gingerbread Spiced Cookies


 Chocolate Peppermint Cupcakes with Marshmallow Candy Cane Frosting Chocolate Peppermint Cupcakes with Marshmallow Candy Cane Frosting
Chocolate Peppermint Cupcakes with Marshmallow Candy Cane Frosting


Seriously Delicious! The first is a riff on my Orange Gingerbread and Chocolate Chunk Cookies, and the second was totally Holiday inspired and the kids loved both! These were both made with Miss Jones Chocolate Cake Mix which is deep, rich and moist!

Between November 11 and December 23, Miss Jones Baking Co. is holding the Bake-it-Better Challenge, which gives you the chance to win a Grand Prize worth over $1,500—including a $1,000 gift card, the full line of Miss Jones products, a KitchenAid Mixer, William-Sonoma Goldtouch Baking Set, Scharffen Berger Chocolates, and much more!

Plus, every entry means $1 donated to the SF-Marin Food Bank  All of my readers know how close to my heart fighting hunger is, so if for no other reason, please do this very sweet thing for those less fortunate!

It's super easy to participate:

Step 1: Bake something fantastic using a Miss Jones baking mix or frosting. Get creative—ideas like pumpkin cake bars, chocolate and pecan cupcakes, maple and walnut sugar cookies. The Miss Jones website [www.missjones.co] has great inspiration, and using one of their mixes makes it super easy (and yummy, obvies).

Step 2: Take a photo of your beautiful treat and post it to Instagram or Facebook using the hashtag #betterwithmissjones. If you're submitting via Instagram, be sure to tag @missjonesco, too! If you're submitting via Facebook, be sure to post your entry directly onto the official Miss Jones Baking Co. Facebook page [https://www.facebook.com/missjonesbakingco/].

To learn more about the contest, go to: www.missjones.co/better.

Disclosure: Thank you to Miss Jones Baking Co. for providing cake mixes, frosting and other goodies! All opinions are my own and in no way influenced by free product.

Monday, November 14, 2016

Pecan Pies in Pumpkin Shells


Many moons ago I had the privilege of working for Disney on several of their websites. This is a recipe that was on Family.com in 2008. 

This fun recipe is perfect for this time of year. From harvest time to Halloween to Thanksgiving, these little pies are both cute and delicious. My mother has made them for dinners and she uses the tiny gourds that look just like pumpkins. Gourds are certainly edible, but can be very bitter. Moms were always wonderful, but I've decided to use mini pumpkins for these. Mini pumpkins are available just about everywhere right now and you'll need ones the size of a medium orange for this.

Corn syrup is not so good for us, so I've replaced it with golden syrup, a pure cane sugar derivative that is sold in most stores under the Lyle's label.

Pecan Pies in Pumpkin Shells

Hands-On Time: 15 minutes
Ready In: 1 hour 10 minutes
Serves: 4

Ingredients:

4 mini pumpkins - each the size of an orange
1/4 cup brown sugar
1/2 cup Lyle's golden syrup
1/2 cup chopped pecans
3 large eggs
1/2 teaspoon vanilla extract

Directions:

1. Cut the tops from each pumpkin and scoop out the seeds.
2. Place pumpkins, cut side down, on a parchment paper lined cookie sheet.
3. Bake in a 350 degree F oven for 15 minutes.
4. While pumpkins are baking, get the pie mix together.
5. Combine syrup, brown sugar and eggs. Mix until well blended.
6. Add pecans and extract. Blend.
7. Remove pumpkins from oven and let cool for 15 minutes.*
8. Pour any excess water from pumpkins and pat insides dry with paper toweling.*
9. Fill each pumpkin with pie mix to just below the top - about 1/2 cup for each.
10. Bake for 30 minutes until set.
11. Let cool before serving.

Notes: *These steps are very important. Squash are full of water and baking them brings this out. If you do not let the pumpkins cool and remove the excess water, the pie will not set.

Tuesday, November 01, 2016

Pumpkin Pie Yogurt Parfaits with Gingersnap Granola

Pumpkin Pie Yogurt Parfait with Gingersnap Granola

What happens when you get a big, beautiful box of fun stuff from Cabot? You create! As soon as the most recent box hit my doorstep I was in the zone and knew exactly what I would make: Pumpkin Yogurt Parfaits. Pumpkin yogurt is relatively new to the market, and as always I'm looking for ways to make things my own. My kids love yogurt with toppings and several of them can never get enough pumpkin pie, so I combined what I think it's a truly delicious version.

Cabot's Vanilla Bean Greek Yogurt is absolutely to-die-for! My kids got their hands on it after I had made this parfait and it was gone in mere minutes. It's the creamiest version of Greek yogurt I've had this far and paired with the pumpkin and spice flavors, it was a knockout hit! I wound up making these again in a couple days' time at the kids' request.

This is so easy to make, I'll give instructions for one parfait with instructions for a full batch of Gingersnap Granola. Ready?

Pumpkin Pie Yogurt Parfait
Serves 1

Ingredients:

1 cup Cabot Vanilla Bean Greek Yogurt
1/3 cup pumpkin pie mix*
A couple shakes of pumpkin pie spice - or about 1/8 teaspoon

Directions:

1. Stir pumpkin pie spice into yogurt and spoon 1/2 cup into a small dish or mason jar if packing for later.
2. Spoon pumpkin pie mix over yogurt and top with last 1/2 cup of yogurt.
3. Top with Gingerbread Granola (recipe below) or put granola in a BNTO cup from Cuppow and seal with a lid.
4. Eat in layers or stir it up, either way is delicious!

*Pumpkin pie mix contains pumpkin puree, spices, and sugar. You can make your own by adding sugar and spices to pumpkin puree to your liking.


Gingersnap Granola

Now for the granola. I didn't use molasses for this as I found it to be overwhelming in granola that already contains gingersnaps. The maple syrup is milder and more complementary to the cookies and oats.

Gingersnap Granola

Hands-On Time: 10 minutes
Ready In: 45 minutes plus 30 minutes cooling time
Serves: Makes 6 cups

Ingredients:

4 cups rolled oats ("old fashioned"-not instant or quick cooking)
1 1/2 cups crushed gingersnap cookies-about 20 (Do not pulverize to crumbs, leave larger pieces)
1 teaspoon Pumpkin Pie Spice**
1/2 cup chopped pecans
1/3 cup oil (I used olive)
1 cup maple syrup (Please, please use real syrup! This is thinner than artificial syrup and the taste is milder)

Directions:

1. Preheat oven to 325 degrees F. Line a baking sheet with parchment paper.
2. Stir together oats, crushed cookies, nuts, and spices in a large bowl.
3. Blend maple syrup and oil and pour over oat mixture.
4. Stir together until everything is well coated and spread evenly on baking sheet.
5. Bake for 20 minutes and stir well. Bake for another 15 minutes or until golden and beginning to dry.
6. Cool for half an hour before storing in an airtight container for up to 2 weeks.

**Pumpkin pie spice is a mixture of powdered cinnamon, nutmeg, ginger, cloves, and/or allspice.


Thursday, October 13, 2016

No-Knead Cheesy Bread

I adore bread. I don't eat a lot of it because of health issues, but boy do I love the stuff. Cheesy bread? Yeah, even that much more. This recipe is from King Arthur Flour along with Cabot Cheese and it's the BOMB. So easy to make you'll find yourself doing this a couple times a week. The possibilities are endless and endlessly delicious!

I added Cabot Sharp Cheddar and Pickled Jalapeños to one loaf and Cabot Orne Meadows Cheddar, Spanish olives and black pepper to another. Total YUM!

King Arthur and Cabot Cheesy Bread
Cabot Sharp Cheddar and Pickled Jalapeños


Cabot Sharp Cheddar and Pickled Jalapeños
Cabot Orne Meadows Cheddar, Spanish olives and black pepper

Cabot Orne Meadows Cheddar, Spanish olives and black pepper

Risen No-Knead Dough

Cheese and chiles


One regular loaf - just as delicious!


No-Knead Crusty White Bread

PREP
5 mins. to 10 mins.

BAKE
30 mins. to 40 mins.

TOTAL
4 hrs 35 mins. to 7 days 50 mins.

YIELD
3 or 4 loaves, depending on size

The most basic of all no-knead loaves, this is a wonderful way to get into yeast-bread baking. The easy stir-together dough rests in your refrigerator, developing flavor all the time, till you're ready to bake. About 90 minutes before you want to serve bread, grab a handful of dough, shape it, let it rise, then bake for 30 minutes. The result? Incredible, crusty artisan-style bread. If you're a first-time bread-baker, you'll never believe this bread came out of your own oven. And even if you're a seasoned bread baker, you'll love this recipe's simplicity.

3 cups lukewarm water
6 1/2 to 7 1/2 cups King Arthur Unbleached All-Purpose Flour* or Organic All-Purpose Flour
1 tablespoon salt
1 1/2 tablespoons instant or active dry yeast
1 cup diced or shredded Cabot Cheese
1/4 cup other mix-in if desired - make sure it's mostly dry or drained very well!
* See "tips" below

Directions

Combine all of the ingredients in a large mixing bowl, or a large (6-quart), food-safe plastic bucket. For first-timers, "lukewarm" means about 105°F, but don't stress over getting the temperatures exact here. Comfortably warm is fine; "OUCH, that's hot!" is not. Yeast is a living thing; treat it nicely.
Mix and stir everything together to make a very sticky, rough dough. If you have a stand mixer, beat at medium speed with the beater blade for 30 to 60 seconds. If you don't have a mixer, just stir-stir-stir with a big spoon or dough whisk until everything is combined.

Next, you're going to let the dough rise. If you've made the dough in a plastic bucket, you're all set — just let it stay there, covering the bucket with a lid or plastic wrap; a shower cap actually works well here. If you've made the dough in a bowl that's not at least 6-quart capacity, transfer it to a large bowl; it's going to rise a lot. There's no need to grease the bowl, though you can if you like; it makes it a bit easier to get the dough out when it's time to bake bread.

Cover the bowl or bucket, and let the dough rise at room temperature for 2 hours. Then refrigerate it for at least 2 hours, or for up to about 7 days. (If you're pressed for time, skip the room-temperature rise, and stick it right into the fridge). The longer you keep it in the fridge, the tangier it'll get; if you chill it for 7 days, it will taste like sourdough. Over the course of the first day or so, it'll rise, then fall. That's OK; that's what it's supposed to do.

When you're ready to make bread, sprinkle the top of the dough with flour; this will make it easier to grab a hunk. Grease your hands, and pull off about 1/4 to 1/3 of the dough — a 14-ounce to 19-ounce piece, if you have a scale. It'll be about the size of a softball, or a large grapefruit.

Plop the sticky dough onto a floured work surface. Knead 1 cup diced or shredded Cabot cheddar into the dough and round it into a ball, or a longer log. Don't fuss around trying to make it perfect; just do the best you can.

Place the loaf on a piece of parchment (if you're going to use a baking stone); or onto a lightly greased or parchment-lined baking sheet. Sift a light coating of flour over the top; this will help keep the bread moist as it rests before baking.

Let the loaf warm to room temperature and rise; this should take about 60 minutes (or longer, up to a couple of hours, if your house is cool). It won't appear to rise upwards that much; rather, it'll seem to settle and expand. Preheat your oven to 450°F while the loaf rests. If you're using a baking stone, position it on a middle rack while the oven preheats. Place a shallow metal or cast iron pan (not glass, Pyrex, or ceramic) on the lowest oven rack, and have 1 cup of hot water ready to go.

When you're ready to bake, take a sharp knife and slash the bread 2 or 3 times, making a cut about 1/2" deep. The bread may deflate a bit; that's OK, it'll pick right up in the hot oven.
Place the bread in the oven — onto the baking stone, if you're using one, or simply onto a middle rack, if it's on a pan — and carefully pour the 1 cup hot water into the shallow pan on the rack beneath. It'll bubble and steam; close the oven door quickly.

Bake the bread for 25 to 35 minutes, until it's a deep, golden brown.

Remove the bread from the oven, and cool it on a rack. Store leftover bread in a plastic bag at room temperature.


Tips from our bakers
  • The flour/liquid ratio is important in this recipe. If you measure flour by sprinkling it into your measuring cup, then gently sweeping off the excess, use 7 1/2 cups. If you measure flour by dipping your cup into the canister, then sweeping off the excess, use 6 1/2 cups. Most accurate of all (and guaranteed to give you the best results), if you measure flour by weight, use 32 ounces. Using the same ratio/measuring, you can make a half-recipe if you prefer. While it's great to have dough on hand, it's fine to make less.
  • Want to try this with whole wheat flour? You can absolutely make up to half of the total flour whole wheat, either our Premium or white whole wheat flours. Add an additional 2 teaspoons water per cup of whole wheat flour to prevent the dough from being too dry.
  • Would it be better to use bread flour here? Bread flour has more gluten-forming protein, so if you choose to use it in this recipe, the crust will be a bit thicker and you won't get quite the same open-holed structure as with all-purpose. We really prefer the texture of both crust and crumb when all-purpose flour is used. If you do use bread flour, increase the water by about 2 teaspoons per cup of flour to make the requisite sticky dough.


Our thanks to Jeff Hertzberg and Zoë François, whose wonderful book, "Artisan Bread in Five Minutes a Day," is the inspiration for this recipe.

Disclosure:   Much thanks to King Arthur Flour and Cabot Cooperative Creamery for the beautiful box of products and recipe! 

Monday, September 26, 2016

Pepperidge Farm Swirl Breads


Who doesn't love Pepperidge Farm Swirl Breads? Here's the thing, if you loved it before, you'll
love it even more now with a new wider slice and more cinnamon! For now it's Cinnamon Swirl and
Raisin Cinnamon Swirl, but let's cross everything we've got that this will soon include the
seasonal breads, as well!

To celebrate this new yumminess Pepperidge Farm is sharing this delicious recipe. I made mine with plain cream cheese and raspberry preserves, but check out the end of the recipe for alternatives!


Pepperidge Farm Swirl Bread French Toast Waffle Sandwiches
Prepares 4 Sandwiches

Ingredients

8 slices   Pepperidge Farm Swirl Bread
8 oz.  Cream Cheese
8 tablespoons    Jelly or jam of your choice
1/2 cup  Milk
5 each   Eggs
1 teaspoon   Vanilla
½ teaspoon  Cinnamon

Method

1. Preheat a waffle iron according to manufacturer’s directions
2. Divide Pepperidge Farm Swirl Bread slices, spread cream cheese on half of the slices, and jelly on the other half then combine into sandwiches.
3. In a shallow bowl, whisk the eggs until the yolks and whites are thoroughly combined, add milk, cinnamon, and nutmeg and whisk to combine.
4. Dip the sandwiches in the egg/milk batter and allow to soak for 30 seconds.
5. Spray waffle iron with non-stick spray, place sandwiches in waffle iron, close lid and cook for 3-5 minutes or until golden brown.
6. Remove sandwiches from toaster and serve with maple syrup or your favorite yogurt as a topping.


Alternative Fillings: Banana with Hazelnut Chocolate Spread, Cream Cheese and Strawberries, Peanut Butter and Banana, Ham and Swiss Cheese, Apple slices and Cheddar cheese


Monday, September 19, 2016

Taste of Home Simple & Delicious Cookbook


This past week I had the chance to review the newest Taste of Home Cookbook. I honestly can't recall the first time I read a Taste of Home magazine, but I know it was at least 20 years ago. This has hands-down been one of my favorite food magazines. I think the biggest draw is the simple recipes from real people. 

I made one recipe a day this past week and there wasn't one that my family didn't love! Not only that, the photos I've shared on social media have been a big hit as well. I'm not sharing recipes here because every recipe from Taste of Home is found on the website! How easy is that? 

This cookbook is full of the best - broken into 20 sections with a total of 1,314 recipes there WILL be something in there you'll love! My favorite sections were Finished in 15, 30 Dinners in 30, Slow Cooking, Oven Entrees and Good Mornings, but I've found recipes from each section that I've marked for making!

I'm missing one photo this week and that's because I didn't forewarn anyone that the recipe that day needed photographed and they ate so fast I never had a chance! That was Breakfast in a Muffin. So good and great for busy mornings so I'll be making them again, and when I do I'll be sure to update with a photo!

Pizzeria Burgers from 30 Dinners in 30.


Spicy Roasted Sausage, Potatoes and Peppers from Oven Entrees (One of my favorites!)

Korean Beef and Rice from Finished in 15.


Pierogi Quesadillas from 30 Dinners in 30.


Croissant Breakfast Casserole from Good Mornings.

French Toast Waffles from Good Mornings.

Here is the official press release, please note the link to purchase this cookbook for yourself, you won't be disappointed!
_________________________________________________________________

New Simple & Delicious Cookbook Caters to Busy Home Cooks
With its Largest Collection and Resource for Quick and Easy Recipes

Features More than 1,300 Easy Recipes for Express Weeknight Dinners, Classroom Treats and More

Biggest Simple & Delicious Collection Yet, On Sale September 13

MILWAUKEE, WI (August 1, 2016) – More than 600 pages of recipes and photos for the busy home cook make up the newSimple & Delicious Cookbook, on sale September 13 wherever books are sold. It is the biggest cookbook of fast-fix recipes in the Simple & Delicious collection, offering 1,314 easy-to-create recipes for family-pleasing foods, segmented so home cooks can choose recipes that take 30 minutes, 15 minutes and even five minutes to create.  

Simple & Delicious aims to make cooking easy for busy people by providing time-saving shopping, cooking and serving tips, and secrets from the pros. The new cookbook from Simple & Delicious is the brand’s biggest cookbook yet, packed with recipes for 15-minute meals, sides and desserts, slow-cooked favorites, and more, and is designed to show cooks how easy it can be to find the time to cook fun and flavorful meals, snacks and treats for their friends and families.

“For the time-stressed home cook, we’ve gathered a collection of fast and easy recipes,” said Catherine Cassidy, Chief Content Officer of Simple & Delicious and Taste of Home. “We hope that this will become an indispensable resource for those who lead busy lives but still want to put delicious food on the table.”

Split into 20 chapters, readers can easily locate the recipes that best suit their needs, including:

·         Finished in 15 – These super-fast entrees and more are on the table in just 15, 10 or even five minutes.
·         30 Dinners in 30 – Sit down to complete meals – a main dish with a side or dessert – in 30 minutes or less.
·         Quick Casseroles – Short prep times make favorite bakes a great choice any day of the week.
·         Make-Ahead Magic – Busy cooks can keep their cool with dishes that go in the freezer or refrigerator.
·         Cook Once, Eat Twice – Make extra food tonight, and then use the leftovers to kick-start an all-new dinner tomorrow.

The cookbook also includes five helpful recipe icons – Eat Smart, Fast Fix, Five Ingredient, Slow Cooker and Freeze It – to help cooks quickly locate the dishes that best suit their families.  

Recipes are selected through a very rigorous testing process done in the Taste of Home Test Kitchen before they are given the Taste of Home stamp of approval. The cookbook also features complete nutrition facts with recipes, free splash guards to keep pages clean while cooking, a photo index for each chapter and 36 menu suggestions to make meal planning easy.

Simple & Delicious Cookbook
ISBN: 978-1-61765-550-0
Hardcover Binder/$29.99

Available online and wherever books are sold on September 13, 2016.

About Simple & Delicious
Simple & Delicious, a Trusted Media Brands, Inc. brand, is the cooking magazine for busy people. Published by Taste of Home, the leading multi-platform producer of information on food, cooking and entertaining, Simple & Delicious serves home cooks engaging media that capture the joy and comfort of food made with love. Simple & Delicious is published six times a year and every issue is packed with more than 100 irresistibly easy recipes and time-saving tips, plus fast-fix weeknight meal ideas, color photos and more. The magazine is available via subscription and on iPad, as well as on newsstands where magazines are sold.

Content from the full suite of Taste of Home products is available online at TasteofHome.com and via the Taste Digital Community, with more than 39 million monthly visitors*, making these sites top destinations for kitchen-tested recipes, how-to techniques, cooking videos and lively community forums. The same engaging content can be found in Taste of Home magazine, with a circulation of 2.5 million; Simple & Delicious magazine; top-selling bookazines; newsstand specials; popular cookbooks; and via digital download on iPad, mobile apps and Kindle.

Learn more at TasteofHome.com/simple for the latest on recipes and food.

Thursday, July 28, 2016

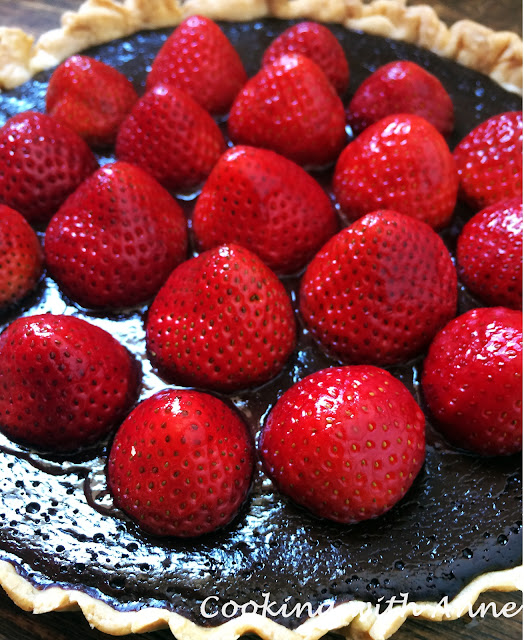
Chocolate Cream and Strawberry Pie


Chocolate Cream and Strawberry Pie

Chocolate Cream and Strawberry Pie

Fasten your seat belts, this chocolate cream is dark and rich and whoa. Slice this beauty of a pie into 16 pieces unless you're truly a chocoholic and can deal with the richness. This is best eaten after a lighter meal for sure.

Try to find strawberries that are on the smaller side and roughly the same size so it looks pretty, you can also slice them on top, but remember sliced berries will weep, so you may have a wet pie afterward.

Chocolate Cream and Strawberry Pie

Chocolate Cream and Strawberry Pie. I used a fluted removable bottom pan for this, a regular pie pan works just as well!

Chocolate Cream and Strawberry Pie

Hands-On Time: 15 minutes
Ready In: 1 hour and 10 minutes
Serves: 8-16

Ingredients:

12 ounces dark chocolate chips
1 cup milk - any fat content
1 large egg - beaten
1  9-inch pie crust - unbaked
1 quart fresh strawberries all roughly the same size, washed and hulled
1/4 cup strawberry jelly or preserves
1 Tablespoon water


Directions:

1. Preheat oven to 325 degrees F.
2. Combine chocolate chips and milk in a heavy saucepan. Heat on low until chips begin to melt. Stir until smooth. Remove from heat.
3. Beat egg in a medium bowl and add 1/4 cup of hot chocolate mixture to egg. Whisk quickly so the egg does not cook, but only thickens.
4. Add egg and chocolate to the first mixture and blend well. The chocolate should be smooth and silky afterward. If it looks lumpy during mixing, stir faster and wait it out, it will usually smooth out.
5. Pour chocolate into pie crust and bake for 25 minutes, or until center is lightly set.
6. Chill pie for 30 minutes.
7. Top pie with strawberries - pointed ends up.
8. Combine strawberry preserves with water and stir until smooth, heat briefly in the microwave if necessary. Brush or drizzle over strawberries.
9. Chill until serving time, at least 30 minutes.

Wednesday, June 01, 2016

Healthy with Anne


Here it is! My newest endeavor, Healthy with Anne. I recently got burned out caring for others at my jobs (because the caring at home never ends!) and decided to go in a different direction, I signed up for a few online courses, pulled my entire life's experience together and am now a certified health coach.


There's lots to offer - go check out the new site! Healthy with Anne 

Thursday, May 26, 2016

Money Saving Ingredient Substitutions

Quick blurb from me - I haven't done one of those in a while - about one of my favorite topics; Saving Money! Not only are these subs cost friendly, several of them are flat-out healthier! Keep this list on-hand for times when you're in the middle of cooking and can't run out.


Monday, May 23, 2016

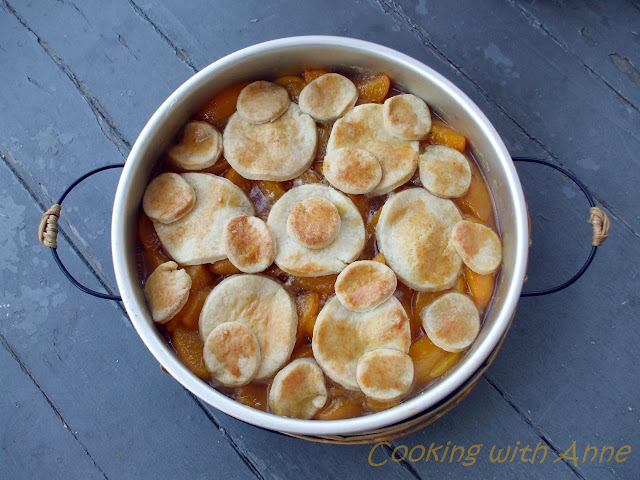
Peach Cobbler

Peach Cobbler
Peach Cobbler


It's just about peach time! Peak time for fresh peaches is usually July in most states, but they're out there as early as May. Choose fruit that yield to slight pressure but aren't mushy and try to avoid hard peaches. All the flavor and sweetness is gained on the tree, not after so no matter what color the skin, you can't really tell until you bite into one. One of the best peaches I ever had came from Newhard Farms in Coplay, PA. Famous for corn, but everything they sell is perfect!

Serve this cobbler warm with vanilla ice cream or whipped cream and watch it  disappear. You can also make this with nectarines, plums or fresh berries for a change of  pace. Canned peaches don't work as well, so try to stick with fresh ripe fruits.


Peach Cobbler

Hands-On Time: 15 minutes
Ready In: 50-55 minutes
Serves: 8

Ingredients:


Filling:

8 large ripe peaches - pitted and sliced, about 6 cups
1/4 cup all-purpose flour
1/3 cup packed light brown sugar
1/4 teaspoon ground cardamom
1/4 teaspoon ground nutmeg
1 teaspoon vanilla extract
1/4 cup butter


Topping:

1 cup all-purpose flour
1 teaspoon baking powder
1/2 teaspoon salt
1/4 cup granulated sugar
1/4 cup butter
1/4 cup to 1/3 cup heavy cream
1 egg - beaten


Directions:

1. Preheat oven to 350 degrees F.
2. Toss together peaches and 1/4 cup flour. Place in the bottom of a greased, shallow 1 - 1/2 quart baking pan.
3. Mix brown sugar, cardamom, nutmeg and vanilla until well blended.
4. Sprinkle brown sugar mixture over peaches in baking dish.
5. Cut 1/4 cup butter in small cubes and dot top of peaches and brown sugar with cubes.
6. Stir together 1 cup flour, baking powder, salt and granulated sugar.
7. Cut second 1/4 cup of butter into small cubes and rub into flour mixture until coarse crumbs form.
8. Add cream to flour and butter and blend until dough forms.
9. Roll out dough on a floured surface to a 1/4-inch thickness. Cut with a 3-inch biscuit cutter and top dough evenly with circles.
10. Brush dough circles with beaten egg.
11. Bake for 35 - 40 minutes until golden and peaches begin bubbling through crust.


Notes:
Dough can be rolled to fit the pan and placed on top completely rather than cutting into circles. Cut slits to vent filling before baking


Friday, May 13, 2016

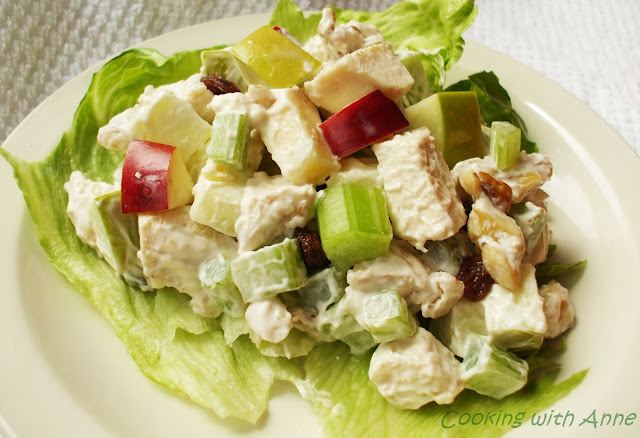
Turkey Waldorf Salad

Turkey Waldorf Salad

I remember this stuff as a kid - it was a big deal in the 1970's it seems. I don't recall it with any type of protein, however. I added leftover turkey to mine, but you can surely use chicken or even shrimp!
Leftover turkey is already cooked, so it couldn't be easier to add to soups, stews and sandwiches. Salads are great with cooked turkey and something lighter is nice after a round heavy turkey dinners. Cooked and cubed turkey is a quick add to many salads -- including my favorite, the Turkey Waldorf Salad. I also swapped out raisins for dried cranberries and replaced mayo with protein rich Greek yogurt.

Turkey Waldorf Salad
Serves 4 - 6

Ingredients:

2 cups diced cooked turkey
2 cups diced apples
1 Tablespoon lemon juice
1/2 cup chopped walnuts
1 cup diced celery
1/2 cup dried cranberries or raisins
1/2 cup plain Greek yogurt
1/3 Tablespoon Kosher salt or more to taste

Directions:

1. Combine apples with lemon juice.
2. Add remaining ingredients and blend well.
3. Chill until serving time or serve right away. Does not keep well.


Thursday, May 05, 2016

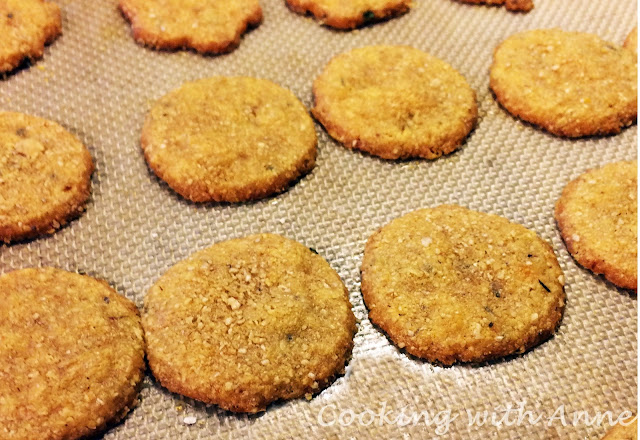
Herbed Cheese Crackers

Herbed Cheese Crackers

This cheese and herb business isn't over yet. I first made these a really long time ago - like, 20 or so years - and loved them each time. I can't keep them longer than a day around here and they're so worth being shared.

Please do use whatever cheese your heart desires as long as it's hard enough to shred, and choose herbs to your liking, as well. I used Cabot's Tomato and Basil Cheddar with extra basil thrown in and their Extra Sharp Cheddar with dill. I also added smoked paprika to the Tomato Basil crackers. These are SO easy you just won't believe it!

Herbed Cheese Crackers

Herbed Cheese Crackers
Makes 4 dozen 1-inch crackers

Ingredients:

1/4 cup (half stick)  room temperature butter -unsalted
2 cups finely shredded cheese (8 ounces)
1 cup oat flour* (yes, you can use all-purpose)
1 to 2 Tablespoons fresh herb, minced or chopped very fine
1/2 teaspoon Kosher salt
Add in cayenne pepper, black pepper, smoked paprika etc. to your liking

Directions:

1. Combine butter, herbs, salt and spice together until smooth - I use my KitchenAid with flat beater for this.
2. Add in shredded cheese and blend well.
3. While the mixer is running add in flour 1/4 cup at a time until combined. Add water as needed to make a stiff dough.
4. Pat dough into a flat circle and wrap in plastic. Chill for 1/2 an hour.
5. Roll out dough and cut into shapes about 1-inch in size.
6. Place crackers on a baking sheet lined with Silpat or parchment, about 1/2 an inch apart. Bake for 12 to 15 minutes or until just beginning to brown at edges.
7. Cool slightly and remove from baking sheets. Store in a cool, dry airtight container for up to a week, if they last that long.

*oat flour is simply rolled (not instant!) oats ground into flour by a processor. Simply put oats into a food processor or blender and pulse until a fine powder-like consistency.


Friday, April 29, 2016

Herby Cheesy Goodness

I've been a gardener for quite some time now (check out my gardening posts!) and that includes growing my own herbs each year, as well.

Herbs are one of the easiest things to grow, outside, inside, in pots, in the ground. Many are really rather hearty and do well no matter what. You just need to give it a try. You can start with a tiny little pot that has soil and seeds already inside - just add water and sun and watch them grow. You can buy a small pot, add some soil and seeds, find a sunny windowsill and wait for beautiful little green things to pop up. Once you have herbs grown, you'll be so happy you did it. There's nothing like fresh herbs for flavoring dishes.

Check out Gardener's Supply for lots of ideas and tools for growing your own garden, even if it's only a windowsill garden of herbs. They have what you need!

Now, once you have those herbs, here are three delicious and easy recipes for you to use them in, each pairing with a delicious Cabot cheese!

The first is cheesy herb-y rolls perfect for an appetizer or to serve with a meal. These are so easy you won't believe it!


Pesto Cheese Rolls
Pesto Cheese Rolls

Pesto Cheese Rolls
Makes 24

Ingredients:

2 sheets puff pastry - thawed
4 Tablespoons prepared pesto*
1/2 cup shredded Cabot Seriously Sharp Cheddar
2 Tablespoons shredded Parmesan cheese

Directions:

1. Preheat oven to 400 degrees F and very lightly grease two 9-inch round baking pans.
2. Unfold pastry and spread 2 Tablespoons pesto on each sheet.
3. Sprinkle each pastry sheet with 1/4 cup of cheese.
4. Roll up tightly from the long end and cut each log into 12 even pieces.
5. Arrange rolls in prepared pans and top with Parmesan cheese.
6, Bake for 15-20 minutes or until golden brown and puffy.


Pesto Cheese Rolls
Pesto Cheese Rolls


*Homemade Pesto:

Pesto
Makes about 1 cup

Printable Recipe

2 cups fresh basil leaves, packed (you can also use a combination of your favorite herbs)
1/4 cup grated Parmesan cheese
1/2 cup Olive oil
3 tablespoons pine nuts, walnuts or almonds
3 garlic cloves, finely minced
salt as needed

Place basil leaves in small batches in food processor and blend until well chopped (do about 3/4 cup at a time). Add about 1/3 the nuts and garlic, blend again.
Add about 1/3 of the Parmesan cheese; blend while slowly adding about 1/3 of the olive oil, stopping to scrape down sides of container.
Process basil pesto until it forms a thick smooth paste. Repeat until all ingredients are used, mix all batches together well. Basil pesto keeps in refrigerator one week, or freeze for a few months.


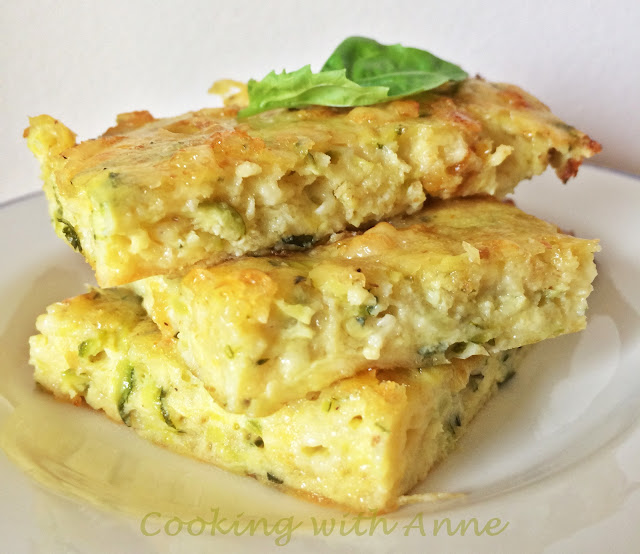
Zucchini-Cheese Squares


Zucchini-Cheese Squares
Makes 36 Appetizers

Ingredients:

3 Tablespoons olive oil
5 medium green onions - sliced thinly
1 clove garlic-minced
2 1/2 cups shredded zucchini
6 eggs, beaten
1/3 cup fine dry bread crumbs
1 teaspoon Kosher salt,
1/4 t pepper
1 Tablespoon each fresh basil and oregano - finely chopped
3 cups shredded Cabot Seriously Sharp cheddar or other flavor

Directions:

1. Heat oil in a frying pan over medium-high heat. Add onion, garlic and zucchini;
cook until all liquid is evaporated and zucchini is tender, about 5 minutes.
2. In a bowl, mix eggs and remaining ingredients and add zucchini mixture.
3. Spread into a greased 9x13 inch baking pan. Bake in a 325° oven for 30 minutes or until set when touched in center.
4. Let cool for at least 15 minutes and cut into small squares.


Cheese Stuffed Mini Peppers
Makes 24 mini peppers

Ingredients:


24 mini peppers
8 ounces Cabot cream cheese 
2 cups finely shredded Cabot Garlic and Herb Cheddar

1/2 cup Cabot sour cream
1 Tablespoon each finely chopped fresh basil and flat leaf parsley

Salt and freshly ground pepper to taste

Directions:


1. Cut peppers in half lengthwise and remove seeds. Set aside.
2. Set cream cheese in a bowl and allow to soften at room temperature.
3. Add cheese, herbs, salt and pepper and sour cream to cream cheese. Blend well.
4. Spoon or pipe cheese into pepper halves. Garnish with whole herbs if desired and serve immediately or chill, covered,  several hours until serving time.


Wednesday, April 27, 2016

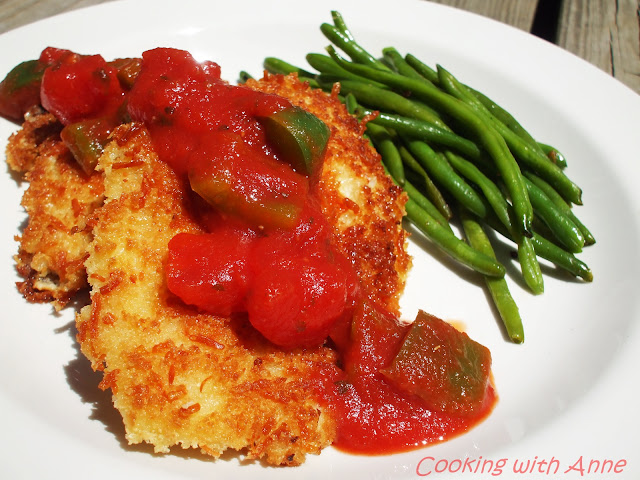
Chicken Panko Romano

Chicken Panko Romano

Panko is a Japanese bread crumb that provides a crunchy coating like no other. Combined with Romano cheese, the result is divine. A thick and hearty tomato sauce offsets the crunch and makes this a perfect meal for company or special dinners at home.

Chicken Panko Romano

Hands-On Time: 20 minutes
Ready In: 30 - 40 minutes
Makes 8 filets


Ingredients:

4 large chicken breasts - boneless and skinless
1 1/2 cups all-purpose flour
2 large eggs
4 Tablespoons water
1 1/2 cups Panko
1/2 cup finely shredded Romano cheese
2 cups of your favorite primavera sauce - homemade is best!
salt and pepper to taste
oil for frying

Directions:

1. Clean chicken breasts of all visible fat and cut each in half horizontally, making 2 filets from each breast.
2. Combine Panko and Romano cheese in a bowl. Put flour into another bowl and mix the egg and water in yet another bowl until well blended.
3.Coat each piece of chicken in flour - shaking off excess, and then in egg wash and lastly in Panko and Romano coating. Make sure there are no bare spots on each breast. Set aside or refrigerate up to 1 hour before frying.
4. Heat a large non-stick pan over medium-high heat and add several tablespoons of oil to the pan. When the oil 'shimmers', it is ready for the chicken. Oil that is not hot enough will absorb into the chicken and oil that is too hot will smoke.
5. Fry each coated filet in the heated oil until golden brown, turning once during cooking - 5 minutes on each side.
7. Drain well on paper toweling and serve immediately with warm sauce.

You can also bake these on a rack on a non-stick baking sheet. Bake at 425 degrees F for 15-20 minutes or until juices run clear when chicken is pierced and crumb coating is golden brown.