Friday, April 23, 2010

Poaching Eggs


Poaching Eggs
Perfectly Poached Egg

When I posted Poached Eggs on Ratatouille Bruschetta, I received comments far and wide (here, Twitter etc.) about the poaching of eggs. It seems that many find it to be a daunting task, so I thought I'd offer a short tutorial about making them.

Poaching Eggs


  1. Fresh eggs are best - the white will become watery and more likely to 'thread' with older eggs. Crack the egg into a small bowl, using one bowl for each egg you intend to cook.
  2. A pot of water is not necessary, rather two inches or so of water will suffice when cooking the eggs. Fill a small pan with two to three inches of water and bring to a simmer only - do not boil! Using a wider pan will allow you to cook more eggs at a time.
  3. Add a teaspoon to a tablespoon of vinegar to the pan. The vinegar will help the whites stay together and usually does not affect the taste. Lower a bowl with an egg just to the edge of the water and gently slip into the water.
  4. Some will say to turn off the heat and cover for 3 minutes, I say it's not necessary and have never lost an egg yet.
  5. Simmer gently for 3 minutes, skimming the surface of the water to remove whites and foam that accumulate.
  6. Remove eggs carefully with a slotted spoon and serve as desired.

Wednesday, April 21, 2010

Eggplant Spread


I'd noticed recently that I was eating far more bread than a person should. After all, what's not to love about the eggshell crisp crust and tender insides of a freshly baked French baguette? No one person needs to consume 18 inches of bread all by themselves, though, so I needed to scale back. This veggie-full spread, which is neither caponata nor ratatouille, but reminiscent of both and just as delicious, served on fresh zucchini rounds was just the ticket.

This recipe calls for tomatoes concassè. Just what is that? Here is a quick tutorial to help you understand the method.

Tomatoes concassè is peeled, seeded and chopped or crushed tomato. The easiest way to peel a tomato is to heat it briefly in boiling water. Follow the photos here and description below. (Click the photo to enlarge.)

Tomatoes concassè
  1. Cut the core from a tomato and turn in upside down.
  2. Cut a small 'X' in the bottom of the tomato and drop into boiling water for 30 seconds.
  3. Remove from water and cool in ice water or very cold water. The heat will cause the peel to separate from the flesh of the tomato and the 'X' will aid in peeling quickly.
  4. Remove the peel and cut the tomato in half crosswise.
  5. Seed by gently squeezing the tomato, cut side down, over a bowl. Crush with your hands (as I did for this dish) or dice with a knife.


Eggplant Spread
Makes 6 cups
Printable Recipe

2 Tablespoons olive oil
4 cloves garlic - minced
1 cup red onion - chopped
2 small eggplants - diced
2 cups baby bella mushrooms - sliced
1 Tablespoon sea salt
6 plum tomatoes concassè
2 Tablespoons capers - drained and rinsed
1 teaspoon anchovy paste
basil, oregano and parsley - 1 teaspoon dried, each
1 cup pitted Nicoise olives
1/2 cup shredded fresh Parmesan


In a large skillet heat olive oil over medium heat and add onion and garlic.
Cook just until onions begin to sweat and are translucent. Add eggplant and mushrooms. Sprinkle salt over all and reduce heat to low. The eggplant and mushrooms will leach their juices and aid the cooking process this takes about 20 minutes.
Once eggplant is softened, add tomatoes, capers, anchovy paste, herbs and olives. Cook for another 20 minutes until all vegetables are soft and flavors are blended.
Remove from heat and stir in Parmesan cheese.
Serve hot or cold with your favorite dippers or bread.


Monday, April 19, 2010

Cherries in Winter by Suzan Colón


Suzan Colón's Cherries in Winter: My Family’s Recipe for Hope in Hard Times, published by Doubleday is just over a baker's dozen of recipes, countless family stories and personal experience woven together to form one of the most comforting books I've read in a long time.

Suzan was working at her dream job at a large magazine when she was laid off and forced to scale back in many areas of her life. She came from a long line of family who lived through lean times and came through it seemingly no worse for the wear. With her own lean times looming large, she put her ancestors' experiences to work for her and tells the tale in this book.

Expensive dinners, posh lunches and anything unnecessary took an immediate backseat and out came tried-and-true family recipes, with stories included, of a more frugal nature.

The recipes each have a story attached, something I thoroughly enjoy. When I wasn't laughing, I was crying - the similarities between several of her family members and several of mine are uncanny and I was often overwhelmed with emotion while reading. That's a good thing - I like stories that make me feel - and this one does just that.

Not to be ignored are the many tips for saving money that are dotted throughout the book, and the simple yet powerful wisdom of Suzan's grandmother is priceless.

I finished this several weeks ago, but I'm already thinking of reading it again - it's just one of those books you don't want to end, but end it did, so I'll just restart it.

Here is one of the recipes from the book, nearly identical to my own great-grandmother's brown sugar cookies, which makes it very special to me.


Suzan's Favorite Butter Cookies
Yields 4 dozen

1 1/2 sticks of butter (room temperature)
1 1/2 cups of flour
1 egg
1 teaspoon vanilla
1 cup light brown sugar
3/4 teaspoon baking soda
Pinch of salt

1. Sift baking soda with flour and salt.
2. Separately, beat egg and sugar until light.
3. Add butter and vanilla to egg and sugar.
4. Combine with flour mixture. (You may also add 1/2 cup of coarse walnuts.)
5. Divide dough into two parts and roll in wax paper.
6. Keep in freezer overnight.
7. Slice and bake 10 - 12 minutes at 350 degrees F.


Monday, March 29, 2010

Healthy Snack Options

I have to admit, when I think about snacking (or any food, for that matter) I don't usually consider fat content. If it's obvious, like lots of mayo or drowned in butter, I'll think twice, but the average day has me eating for flavor more than anything.

Most snacks that are low fat aren't very flavorful or interesting, especially the fat-free varieties. I adore vegetables, but apart from that, I tend to seek out snacks with too much fat - but not on purpose.

I had been seeing kale chips all over the place lately and decided to give them a try. They aren't anything new - in fact I found mentions of them several years old, but they seem to be a big deal right now. Along with kale chips I also made two snacks from my favorite legume - chickpeas. I made roasted chickpeas and a fat free 'hummus'. I can say for sure that each of these had so much flavor that I'll be making them again and again. See what you think.


Kale Chips
Kale Chips

1) Kale chips are nothing but clean, dry kale leaves roasted in an oven until crisp. You can salt them or spray with olive oil before toasting, but I found that I really liked them just plain - and even better, my kids loved them! The two youngest got their hands on them and demolished an entire sheet tray! That's one awesome snack. These are totally fat-free if you toast them without olive oil and have a small amount of fat if you mist them first with oil.

Kale Chips
This is for one pound of kale, which makes several baking sheets of chips.
1. Preheat oven to 450 degrees F.
2. Wash kale and remove large stems and veins. Dry completely with a salad spinner or paper toweling.
3. Tear into bite-sized pieces and lay on parchment lined baking sheets. Mist with olive oil and sprinkle with sea salt - or leave plain.
4. Roast for 7 to 10 minutes and remove before they brown. Cool and enjoy!

You MUST tear these into bite-sized pieces unless you want a big mess each time you bite one. I made the mistake of leaving them larger and they fall apart when you bite into them.


Roasted Chickpeas
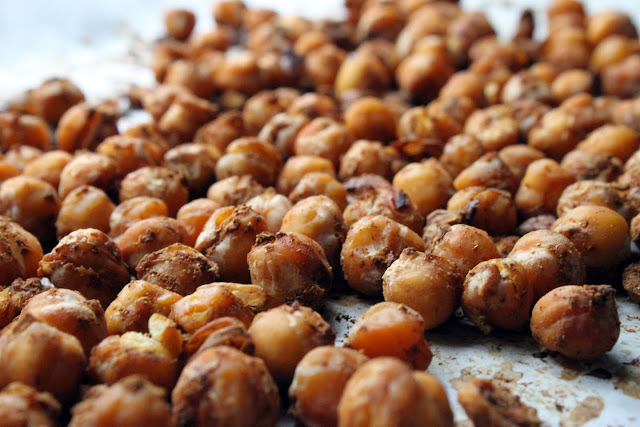
Roasted Chickpeas

2) Roasted Chickpeas are so good. Garbanzos have a small amount of natural fat to them and there's no way around that, but you don't need to add any at all for this recipe. I used Moroccan spice from my Moroccan Spiced Beef Roast and Sweet Potatoes recipe and it was awesome. This was another one the kids couldn't get enough of ... me, either.

Moroccan Spiced Roasted Chickpea Snack
Makes 2 cups
1 can chickpeas, drained
1 teaspoon garlic powder
1 teaspoon Kosher or sea salt
1 teaspoon ground cumin
1 teaspoon sweet paprika
1/2 teaspoon ground cinnamon
1/4 teaspoon cayenne pepper

Preheat oven to 450 degrees F.
Toss beans with seasonings and lay out on a parchment-lined baking sheet.
Roast for 45 minutes stirring every 15 minutes so they don't burn and cook evenly.
Check for doneness (they should be crunchy and not soft at all) and put back into the oven for 5 minute intervals if they are not ready).


Fat-Free 'Hummus'
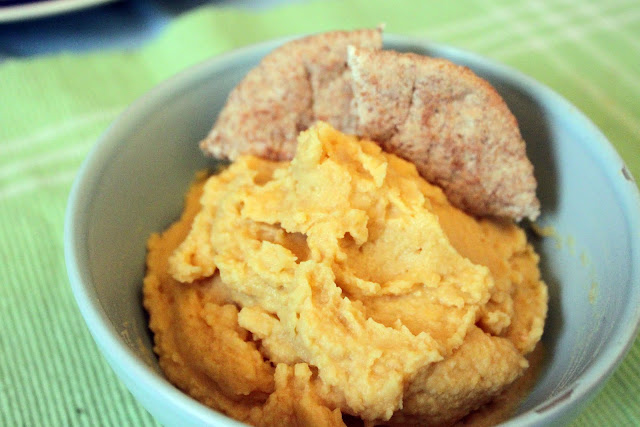
Fat-Free 'Hummus'

3) I have a hard time calling this one hummus as it is missing a vital ingredient to hummus - sesame paste (tahini). It is very good as-is and, just like the chickpea snack, there is a small amount of natural fat. No matter, add whatever you like to this basic recipe to up the flavor if you like.

Fat-Free 'Hummus'
1 can (2 cups) chickpeas - drained
1/4 cup lemon juice
2 cloves garlic - minced
1 teaspoon Kosher or sea salt

Whir everything together in the blender or food processor until smooth. Serve with chips or crackers - or kale chips! I like this with some red pepper or green onion added in.


Tuesday, March 23, 2010

Caramelized Onion, Artichoke Heart and Goat Cheese Turnovers


Before I get to the recipe today, I have to let you know about a small article about me at The Meal Planning Mom. I was asked to send in a recipe for possible inclusion in one of the weekly menus at MenuForTheWeek.com, so I did. They liked it and are using it in this week's menu!

On to these delicious little turnovers. I had several spring vegetables on-hand that I was unsure what to make with. I finally decided on these handheld pies and they are far more delicious than I thought they would be.

Caramelized Onion, Artichoke Heart and Goat Cheese Turnovers
Makes 8 turnovers
Printable Recipe

10 cipollini onions - peeled and sliced
1 bunch green or spring onions - sliced
1 large shallot - sliced
2 cloves garlic - minced
2 Tablespoons olive oil
1 cup artichoke hearts in brine - drained and chopped
4 ounces goat cheese
1 recipe double-crust pie dough (I like pate brisee)
1 egg and 1 Tablespoon water beaten to make egg wash

1. Preheat oven to 400 degrees F. Line 2 baking sheets with parchment paper.
2. Roll dough to 1/8-inch thickness and cut into 8 circles 3-inches in diameter. Cover with plastic wrap and set aside.
3. Combine olive oil and all onions in a small pan - cook over a low flame until caramelized. This can take up to 15 minutes.
4. When onions are done, place a spoonful in the center of each pastry circle. Top with artichoke hearts and goat cheese. Brush the edges of pastry with egg wash.
5. Fold over and press to close. Brush each with egg wash and bake on parchment lined baking sheets until golden brown, 15 to 20 minutes.