Monday, October 27, 2014

Meyer Lemon Cake with Chocolate Filling and Lemon Glaze

Meyer Lemon Cake
Meyer Lemon Cake with Chocolate Filling and Lemon Glaze

Yes, I baked again. I feel as though I bake very often - it's what the kids like - but I DO make savory dishes ... I promise. I couldn't help but make this cake. I came across Meyer lemons at Wegmans the other day (so early in the season!) and had to buy them; they're so difficult to find here. Once I had them I honestly had no clue what I was going to do with them.

Then came work. A very dear woman who was working with us for about half a year left us to go home to Florida this week and another worker made her a lemon cake as a sweet send-off. Now, the worker who made it was raised on boxed cake mix and quite honestly doesn't have much time at home to make anything from scratch, so she did her very best, and sweetest, and whipped up that cake for our friend. I then knew what I would be doing with those lemons - making a cake the way I was raised ... from scratch.

The kids were interested in the smooth-skinned specimens and all wanted to try this slightly sweeter lemon. They all liked it and milled about the kitchen as I made the cakes. Once they were baked and cooled and I was making the chocolate filling they were even more interested and the only question on their lips at the sight of the smooth chocolate icing was, "Is that for dessert after dinner?" Though I was done by 1 in the afternoon I had to crush their little hopes and tell them that it was indeed not going to be consumed until later in the day. Poor dears.

Here's the recipe in all its lemony-chocolaty loveliness. Please do let me know if you've made it so we can swap notes.

Meyer Lemon Cake with Chocolate Filling and Lemon Glaze
Beautiful, light and delicious cake!

Meyer Lemon Cake with Chocolate Filling and Lemon Glaze
Makes 1 cake

Ingredients:

3 cups sugar
1 Tablespoon grated Meyer lemon zest
2 sticks unsalted butter cut into cubes
4 1/2  cups cake flour
2 Tablespoons baking powder
1 teaspoon salt
2 1/2 cups buttermilk
8 large egg whites

Chocolate Filling*
Lemon Glaze**

Directions:

1. Preheat oven to 350 degrees F. Grease and flour two 10-inch round cake pans.
2. In a large mixing bowl pour in sugar and add lemon zest. Work zest into sugar well until fragrant. Add butter and beat until fluffy. Set aside.
3. In another smaller bowl combine flour, salt and baking powder.
4. In a third bowl combine egg whites and buttermilk.
5. Add flour and buttermilk mixture to sugar and butter a little at a time until well combined. This makes a thick batter.
6. Pour evenly into both cake pans and bake until a toothpick inserted in the center of each comes out clean. Cool completely before removing from pans.
7. Cover bottom layer with chocolate on the top only. Add second layer and pour glaze over the top. Serve at once.

Notes: Meyer lemons are very hard to zest - I removed the skin and scraped the pith before mincing with a knife. When using zest, always rub it together with the sugar for the very best fragrance and flavor.


*Chocolate Filling:

1 cup semi-sweet chocolate morsels
2 Tablespoons butter
1 - 2 cups confectioner's sugar
Milk as needed

Melt together chips and butter. Add in confectioner's sugar 1/2 cup at a time until smooth and spreadable. Add milk if needed to thin as you go.


**Lemon Glaze:

3 cups confectioner's sugar
2 Tablespoons Meyer lemon juice
Milk as needed

Combine sugar and juice. Stir well and add milk as needed to thin into a drizzling consistency.


Tuesday, October 07, 2014

Apple Cakey Pie Thing Gooey Goodness

Apple Cakey Pie Thing Gooey Goodness

A couple weeks ago I came across a cake on a site (thanks to Mark Boxshus, A.K.A. Boscoe the Cookie Doctor) and thought it looked awesome, but there was no way it would work. I also thought it would be awesome with a topping like the one we use for Nana's Apple Cake.


I had no idea how this monster of a thing would turn out so I tried it. I tweaked it here and there and made it several times before I was happy with it. Just the photos alone on Facebook and Instagram stirred people.

When I posted to Instagram I called it: "Apple cakey pie thing gooey goodness" and SoVeryDomestic remarked, "That should really be the official name." So, I obliged and here we are. 


The first time I made it several of the kids said it was the best apple pie they ever had. It's not quite a pie, though, so we called it "pie cake". The inside seems to be almost not fully done, but it is - we struggled to find the right words for the consistency and realized it's almost like the texture you get when you let ice cream melt on your warm crumb-topped pie. It's really wonderful.


Apple Cakey Pie Thing Gooey Goodness

Apple Cakey Pie Thing Gooey Goodness
Serves 10-12
Printable Recipe

Ingredients:

Crust and topping:

2 sticks butter (1 cup) cut into small pieces
2 cups all-purpose flour
1 cup packed light brown sugar
1 teaspoon ground cinnamon


Filling:

12 small or 8 large Granny Smith apples - peeled and thinly sliced
1/2 cup packed light brown sugar
1/2 teaspoon ground cinnamon

Cake:

1/3 cup butter
1/2 cup white sugar
1 egg
1/2 cup milk
1 teaspoon vanilla extract
1 cup flour
1 teaspoon baking powder

Directions:
Preheat oven to 350 degrees F

1. Combine crust and topping ingredients: Stir together flour, sugar and cinnamon - rub into butter until crumbly. Set aside 1/3 of this and press the rest into a 10-inch springform pan. Cover the bottom and press part way up the sides - about 1/2 an inch up.

2. Combine apples and brown sugar with cinnamon. Toss well to coat. Pour into crust. This should come up to the top and possibly slightly over.

3. Stir together cake ingredients: Melt butter and stir in sugar and vanilla. Add milk and egg and blend well. Stir in flour and baking powder. Pour over top of apples and tap to help it cover over the apples well.

4. Crumble the rest of the topping across the cake and set on a baking sheet.

5. Bake for 1 hour and 20 minutes or until browned on top and bubbly at the edge.

6. Let cool well (about an hour) and run a knife around the edge. Slice now if you wish or remove ring and cut into 10-12 pieces.

Thursday, October 02, 2014

Apple Season

Bag of Apples
Apples from friends are the best!

It's no surprise to anyone I know that fall is my favorite time of year. There are so many reasons why, but one of the biggest is that it's prime time for apples. I have my favorites there, as well; Granny Smith or Pink Lady for eating, and a mix of Granny Smith and Macintosh for baking and cooking. Just this month I was introduced to SweeTango apples and fell in love with those, too.

I also get into the kitchen more in autumn, with apples ripe for the picking, pumpkins abound and meats being smoked for preserving ... it just makes me want to cook - and eat! This year (and at least one year past) I had a friend who picked apples from another friend's tree and dropped off what felt like about 40 pounds of apples. It was one packed bag. One look in that bag and I knew I'd be in the kitchen for days creating wonderful things.


Processing Apples
Processing apples for applesauce.

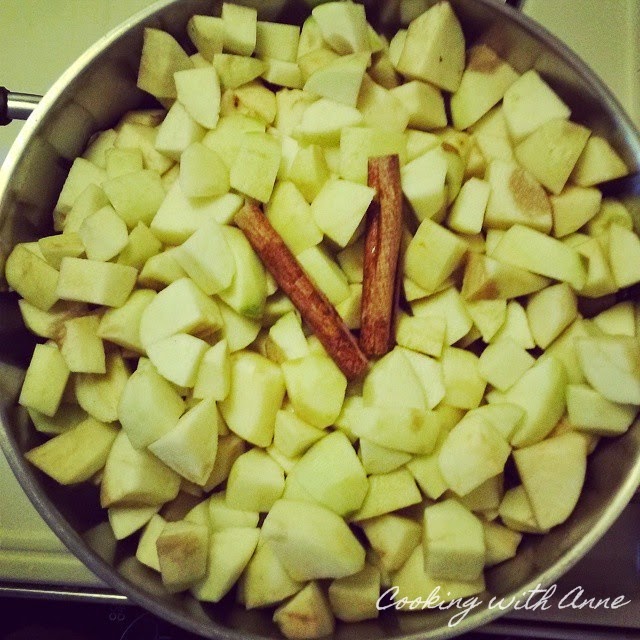
The first thing we did was process a bunch for applesauce  - I think we ended up with a gallon! It's so easy, just peel, core and chop, add a little water, sugar and cinnamon to taste and cook until mushy. I run mine through a food mill, but you can also put them in a food processor and pulse until it's the consistency you like. Mine doesn't last so long here, so I simply refrigerate until it's eaten up. You can surely can it and here are some great directions for that: Canning Applesauce.


Making Applesauce
Apples ready to cook into applesauce.

The next thing I did was process apples for pie filling, which is then put in the freezer to use at a later date. With a 60 hour work week and 7 kids, I need all the time I can get and freezing foods helps me so much in that department.

Freezer Pie Filling
Apple Pie Filling ready for the freezer.

This is very simple. Start with your favorite pie apple - I like Granny Smith or a mixture of Granny Smith and Macintosh - about 5 or 6 large apples will make an 8-inch pie. I used 15 - 20 medium apples and had enough for 3 pies. These apples were tart, so I added a little more sugar than usual to them, some cinnamon and a bit of flour to help thicken as they bake and also to help soak up some of the juices that are inevitable from thawing frozen apples. I tossed every thing with my hands and then divided it into labeled bags (label them before you fill them to make that step easier) - about 3 cups of filling per bag. Into the freezer they went and when I need one I'll remove it ahead of time and let thaw in the refrigerator overnight. Voila!

Freezer Apple Pie Filling
Thawed filling in pie crust.


You can cook this and cool before freezing or cook once thawed (see directions). You can also thaw and dump into crusts and bake! I've found just about any way works. This is perfect for nights when I really want a pie but don't want to do all that peeling. You can also make pie dough ahead of time, shape into discs and freeze as well until you need it!

Apple Pie Filling for the Freezer
Makes 1 pie

Ingredients:

5 or 6 large apples such as Granny Smith or a mixture of apples
1/2 to 3/4 cup brown sugar as needed for sweetness
1 teaspoon ground cinnamon
1/4 cup all-purpose flour
1 teaspoon fresh lemon juice - optional

Directions:

1. Label a gallon-size freezer bag for Apple Pie Filling and date. Set aside.
2. Peel and core apples and sliced to desired thickness - we like thin apples here.
3. Place slices in a large bowl and add sugar, cinnamon, flour and lemon juice if using - mix with hands until well combined.
4. Pour into a freezer bag and remove excess air. Freeze and use within 6 months.
5. You can also cook the filling at this time and freeze once cooled.
6. Once thawed, cook the filling until apples are tender and sauce is thickened. Cool, add to pie crusts and bake as usual.