
I know they're a little wonky, but as all of my kids have their own aprons they decided to come and "watch". Of course that doesn't really mean watch, it means touch ... a lot.
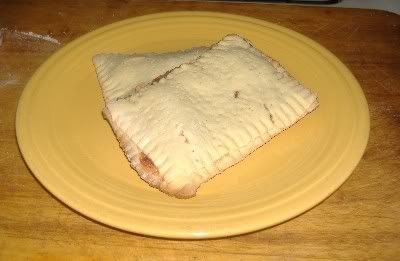
Anyhow, we ran out of toaster tarts (Pop Tarts) and as I've had a recipe or two sitting around forever I decided to give it a whirl. Yes, it's too hot for baking, but I cut the dough in half and put one half back in the fridge so I only made 8. I couldn't keep the oven on for that long.
Once they were done and the kids decided they were way better than store bought, I did
some costing and found that for me to make my own they cost about 6¢ each as opposed to
12¢ each for the cheap kind and 20¢ each for the name brand!
They are a bit of work but not terribly so and you can put whatever you want in the middle of
them, even combos the "big guys" haven't even thought of yet. I plan on working around with it to come up with a chocolate dough too and if I pin it down I'll share it.
I promise tomorrow we'll get back to Summertime cooking.
This is a combination of a couple recipes - feel free to cut the recipe in half, it will work just as well.
Toaster Tarts
1c sugar
1c margarine or butter-softened
4 eggs
1 tsp vanilla extract
5 c flour
4 t baking powder
Filling:
Jam, jelly, preserves or whatever will firm up a bit when they are cooled.
Beat butter or margarine together until fluffy. Add eggs one at a time while beating and then add vanilla. Stir in flour and baking powder until a soft dough forms. Cut in half and flatten each half a bit and wrap in plastic. Refrigerate for several hours or overnight.
You can either cut the dough into 16 rectangles and fit two together with filling in the center (about a tablespoon per tart) and trim the edges OR roll a large rectangle and fold in half and cut into 8 pieces so the top and bottom of each are more uniform before putting the filling on them. This is what I did - I didn't want to roll all day long.
Crimp the edges closed with a fork and poke the tops well with a fork. Set on cookie sheets (I didn't grease mine) and bake at 350 F for about 20 minutes or until lightly browned on the edges. You can poke them with a fork again halfway through baking time to keep them flat or, if that doesn't matter to you, let them bake, they don't get that puffy anyway.
You can brush them with a bit of milk or beaten egg white before baking also and when they are done they can be frosted with a simple powdered sugar icing.
4 comments:
That's really great. And - you can create a much healthier snack than the ones you buy.
Cas
You just think of everything- they looked wonderful :)
Oh, Anne. We made these today, with chocolate filling - OMG! They are so good. Thank you for sharing this recipe!
Awesome! I'm not sure the cost is the same now (2 years later) but I'm sure it's still cheaper than the name brand ones. Thanks for letting me know!
Post a Comment