Monday, December 23, 2013

Nanaimo Bars


Ever since I was a child, and probably before I was born, my mother has been making a confection for Christmas that we always called "Grandma's Chocolate Squares". The recipe had come from my paternal grandmother, Ola Foster, and was passed down to just about everyone.

There wasn't a year that went by without those squares; a rich fudgy bottom studded with walnuts and coconut then slathered with a creamy, buttery center topped off with a layer of dark chocolate. They were always cut into small squares because they were so rich you couldn't eat too much ... unless you were a kid, in which case you'd finish off 5 or 6 squares and go back for more later.

My oldest brother was off at a convention where people were serving a potluck of international delights. Each table had a specialty from that country and Bobby came across a woman who had a platter full of Grandma's Chocolate Squares. He was flabbergasted, of course, and wanted to know how this woman had gotten grandma's recipe.

The woman explained that they were called "Nanaimo Bars" and were a big deal across Canada. Not surprisingly, grandma was born and raised in Ontario. Finally the "squares" had a name. No matter, we still call them "Grandma's Chocolate Squares".

Nanaimo Bars or Grandma's Chocolate Squares
Makes: One 9x9 pan

First Layer:

1/2 C Butter
1/4 C granulated sugar
1 egg
5 T cocoa
1 tsp. vanilla
2 C graham cracker crumbs
1 C coconut
1/2 C chopped walnuts

Second Layer:

1/2 C butter, softened
3 T milk
2 T instant vanilla pudding
2 C powdered sugar

Third Layer:

1  6 oz. Pkg. choc. Chips

First layer: Mix butter, sugar, eggs, cocoa, & vanilla
over hot water until it resembles custard. Add the
crumbs, coconut & walnuts. Press into a 9 X 9-inch
square pan. Cool.

Second Layer: Cream butter, milk, & pudding together,
then blend in powdered sugar. Spread over the first
layer & let stand for 15 minutes.

Third Layer: Melt chocolate & spread over the second
layer. Cut into squares.

Yield: 36 1-1/2-inch squares

Monday, December 02, 2013

Snowman Cookies

Snowman Cookies 

When it comes to making cookies, it's nothing I'm so fond of. I've explained reasons for this before, so I'll just stick to what I like about these particular cookies. They're easy.

I don't have the best hand for decorating cookies or cakes or the like, so if I'm going to do it at all, it needs to be simple. Likewise, if I'm making cut cookies, I don't appreciate the type that need to be pried from the cookie sheet in tiny measures so parts don't break off ... like antlers or legs etc. Round cookies are good. Round cookies don't have odd edges or take excessive time to cut out and transfer from counter to cookie sheet to racks.

I first started making these several years ago and the kids really loved them. The design is simple and the cookies are delicious (who doesn't love a good butter cookie?) and they take almost no time to decorate and still turn out looking good. My kind of cookie.

First, the cookie itself. This is a nice butter cookie recipe that rolls well and bakes quickly. When rolling I always use a combination of half flour and half confectioners' sugar. There's nothing like biting into a cookie that tastes of too much flour from the rolling process. Keep the dough you're not rolling in the refrigerator until you need it and work quickly so the dough doesn't get too warm when you are rolling.

Butter Cookies for Rolling
Makes 24  cookies that are 3 inches in diameter

1 cup butter - softened
1 cup granulated sugar
1 large egg
1 Tablespoon vanilla extract
2 1/4 to 2 1/2 cups flour
1 teaspoon baking powder

Icing:

1 cup powdered sugar
4 teaspoons milk (or more if needed)
Orange and black food coloring paste or drops

1. Cream together butter and sugar until fluffy.
2. Add egg and vanilla and mix well.
3. Add flour and baking powder in small amounts until well incorporated. This makes a stiff dough.
4. Divide dough in half and flatten into a disc. Wrap in plastic and refrigerate for 2 hours.
5. Dust a board or other surface with flour and powdered sugar and roll dough to 1/4" thick.
6. Cut 12 rounds of dough, re-rolling as needed and place rounds on a greased baking sheet. I use a 3" biscuit cutter for this that works perfectly.
7. Bake at 375 degrees F for 12-15 minutes or until edges of cookies just begin to brown.
8. Cool for 2 minutes before removing to racks to cool completely.

Make Icing:

Combine powdered sugar and milk until smooth. Divide into 3 portions, white being the largest, and add food coloring to 2 parts making one black and one orange. keep covered until ready to use as it will dry out quickly.

Now to decorate!

Cooled Cookies

Three Icing Colors

Drop icing in the center of each cookie  with a spoon. It will start to spread.

Finish spreading with a knife to near the edge. The icing will spread a bit more once spread with the knife, so leave a small edge.

Let this dry for 15 minutes before applying the colored icing.

Use a toothpick to add the nose. Put some in the center of the cookie and pull gently to the side to create a pointy nose.

"Carrot" nose!

Add eyes and smile with a toothpick as well. Be careful not to let it drip where you don't want it.

You can also make them look a bit more like "The Snowman" Cute!

Adorable and easy finished snowman cookies. Don't make these too far ahead of time or the icing will "bleed" and not look so pretty anymore. 


Sun Chips and Holiday Entertaining Giveaway

***We have a WINNER! My most-adorable littlest noseminer, Lara, picked number FOUR as today's winner. That's you, Sandy Smith! Congratulations and thank you to all who entered!***


When SunChips® were first launched in the early 1990s, I wasn't quite sure what to make of them. I'd never had a chip that wasn't wholly savory and the multigrains in SunChips® gave them a slightly sweet flavor. I found though, that once I got started, they were very addictive and difficult to put down.

I still feel that way about each and every flavor produced by SunChips®. The best part about these is the fact that they double in use as a chip OR cracker. You can top these babies with just about anything and they hold up and keep their crunch while adding a unique flavor profile to whatever they're paired with. Just about any recipe you have that uses a cracker underneath is great for use with SunChips®. Likewise, any recipe that calls for tortilla chips is perfect with SunChips® (I think this Taco Casserole is a winner!)

Try using them crushed in place of bread crumbs for an extra flavor kick. In fact, Sweet & Spicy BBQ SunChips® would be so good as a coating for chicken or pork before baking or frying. Give it a try.


I also have a sweet giveaway going on and you don't want to miss entering! Check out this photo below for the prize winnings:

·        Sweet & Spicy BBQ SunChips®

·        SunChips® Tote Bag

·        SunChips® Tumbler

·        Chip Bowl (I also filled this with clementines for my holiday table!)

·        Fall Napkin Set

·        Four delicious recipes using SunChips®

Share any component of this post on your favorite social media (Twitter, Pinterest, Facebook etc.) and share a comment HERE on this post sharing a link to your own share to be entered. Make sure to leave a form of contact as well. That's it! One winner will be chosen by randomizer on Monday, December 9th at 11:59 P.M. EST so get your entry in TODAY!

Disclosure: SunChips products and prizes were provided free of charge to me and to one lucky winner. All opinions and views are my own. 

Tuesday, November 26, 2013

Country Crock Casseroles and Carla Hall

It's almost Thanksgiving Day here in the U.S. and I'm almost ready for it. Are you? How about a speedy casserole that's sure to become a favorite? I have that for you PLUS an interview I was lucky enough to do with Carla Hall of The Chew and Top Chef fame. She also shared some recipes with me that I'll pass on to you. This way you'll not only be ready for the big day, but you'll also be ready for those leftovers!

First up: The Interview! Top Chef Season 5 was our very favorite. In fact, I've had the pleasure to meet Fabio Viviani twice (interview here and photos here) and now I've spoken with Carla Hall. A true fan's ultimate experiences. 


Isn't she just adorable? I can't say it enough! I was so nervous I was giggling too much and quaking in my shoes. She really helps a person relax because she's just so personable and I LOVE her views on food. 
Check out the recipes for the dishes Carla shared in the interview here:
I can't wait for leftovers to make that last one.


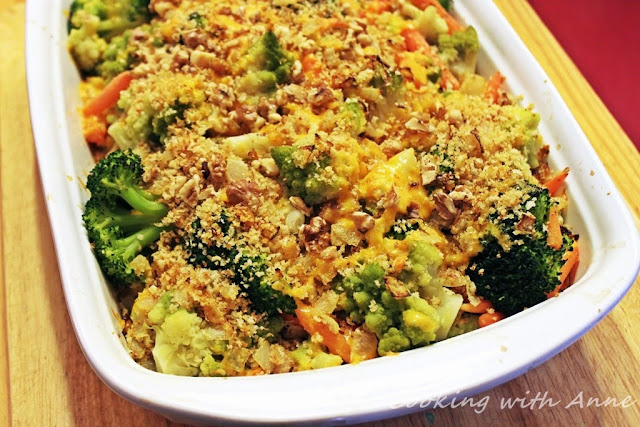
Now, The Recipes! First is my take on the Country Crock Thanksgiving Family Fave Veggie Casserole.
(My additions/changes are in red) 

Thanksgiving Family Fave Veggie Casserole

I love walnuts for extra crunch on top of my casseroles!


Thanksgiving Family Fave Veggie Casserole

Ingredients:

1/2 cup Country Crock® Spread, divided
2 cups chopped onions
3/4 cup Panko bread crumbs (I also added 1 cup of chopped walnuts)
8 cups cooked mixed vegetables (I used broccoli, Romanseco cauliflower and baby carrots)
1 1/2 cups shredded 2 % cheddar cheese, divided  (I used 1 cup white cheddar and 1 cup sharp cheddar)

Directions:

Preheat oven to 375°.
Melt 1/4 cup Country Crock® Spread over medium-high heat in large nonstick skillet and cook onion, stirring occasionally, until golden brown, about 8 minutes.
Stir in bread crumbs and cook, stirring occasionally, until lightly toasted, about 2 minutes; remove to bowl. Melt remaining 1/4 cup Spread in same skillet and add vegetables; toss to coat.
Pour 1/2 into shallow 2-qt. baking dish.
Sprinkle with 1/2 of the cheese and 1/2 of the crumb mixture.
Repeat with remaining ingredients.
Bake until heated through and cheese is melted, about 25 minutes.
TIP: Thawed frozen vegetables or canned vegetables can be used instead of fresh.


*Disclosure: I received product, a product coupon and stipend for extra ingredients from Country Crock for free.

Friday, October 04, 2013

Fresh Sliced Pumpkin Pie

Fresh Sliced Pumpkin Pie

Many years ago as a child I read the Little House on the Prairie series and fell in love with it. Since then I've read the entire series again and again countless times; to myself and also aloud to my children. I was fascinated with the way the Ingalls family lived; what they ate, what they wore and how they built their homes.

In one particular book (The Long Winter)  "Ma" makes a pie from a green pumpkin and to everyone's amazement, it tastes nearly like apple pie. I couldn't find a truly green pumpkin here, but when the season is right small pie pumpkins are sold just about everywhere.

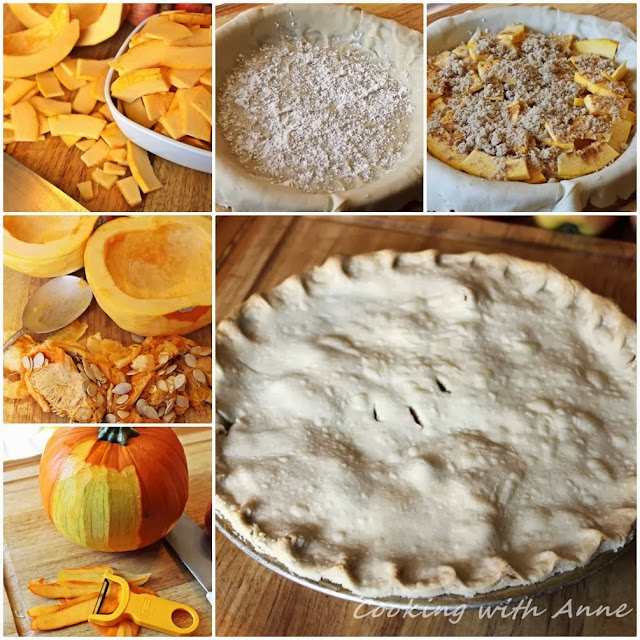
I dutifully peeled, seeded and sliced the small pumpkin and layered it with spices and sugar in a pie crust and the result was very good. I wouldn't say it was wonderful or even delicious because I think our mind plays tricks on us when we're so used to something as pureed pumpkin in pies that when we have it in another form, it's just odd.

Making Fresh Sliced Pumpkin Pie

I won't say this was odd, either ... it was good. It was definitely worth the try and I do have at least one child who can't seem to get enough! See what you think. I may change it slightly and try again, just for fun.

Fresh Sliced Pumpkin Pie
Makes 1 Pie
Ready In: 1 hour 20 minutes

Ingredients:

One double pie crust
One 3-pound pie pumpkin
2 tablespoons flour
1/2 cup brown sugar
1 teaspoon pumpkin pie spice

Directions:

1. Preheat oven to 375 degrees F.
2. Wash and peel pumpkin. Remove insides with a sharp-edged spoon and keep the seeds or discard.
3. Slice pumpkin thinly.
4. Place one pie crust in a 9-inch pie pan and dust with flour. Add half of the sliced pumpkin, half of the spic and half of the sugar. Repeat.
5. Top with second crust and seal edges. Vent top and put on a baking sheet in case of spillage.
6. Bake for 1 hour until crust is browned and vents are bubbling with pumpkin juices.
7. Allow to cool for an hour before slicing.


Wednesday, October 02, 2013

Chicken and Feta Tarts

Chicken and Feta Tarts

Chicken and feta are a favorite combination and these little tarts are the perfect appetizer or game-day bite for 12 or a light brunch for 6 served with a big green salad. Change the green herb to whatever suits your tastes and if Kalamata olives are not a favorite, California ripe are just as delicious.

Chicken and Feta Tarts
Hands-On Time: 10 minutes
Ready In: 25 minutes
Serves: 6

Ingredients:

1 package refrigerated pie crusts at room temperature
15 ounces ricotta cheese
1 egg white
4 green onions - green and white parts sliced thinly
1 tablespoon finely chopped basil
1 teaspoon salt
1/2 cup pitted Kalamata olives
1 cup crumbled Feta cheese
2 cups shredded rotisserie chicken

Directions:

1. Preheat oven to 375 degrees F and line 2 baking sheets with parchment paper or mist with cooking spray.
2. Unroll pie crusts and cut with a 3-inch biscuit cutter into 12 rounds, gathering dough and re-rolling as necessary. Lay dough rounds on baking sheets, 6 per sheet.
3. Combine ricotta cheese with green onion, egg white, basil and salt. Stir until well blended.
4. Top each dough round with 2 tablespoons ricotta mixture, shredded chicken, a teaspoon or so of Feta cheese and Kalamata olives, keeping the toppings centered and leaving an edge of pie crust about 1/2 - inch wide.
5. Fold edges of pie crust upward leaving most of the filling exposed.
6. Bake for 13 to 20 minutes or until crust is golden and filling is slightly puffy.
7. Cool briefly before serving.


Monday, September 02, 2013

Lunchtime Layered Salads

Individual Layered Salads
Back-to-school around here is a big deal. After the kids have been home to roost for the summer, it's good to get back into the usual schedule and accomplish a thing or two without kids underfoot. Many times, though, the stresses of what to pack for lunch overshadows the rest. I've been blessed with kids who eat almost anything, with a naysayer or two thrown in for good measure, but making sure their lunches are balanced and healthy is another issue.

My perfect solution to the packed lunch conundrum is a classic layered salad in individual portions. Each kid can have the salad their way in just their size and it's easy to carry and keep food-safe until lunchtime as well. Start with a base of fresh greens and build as you like. The following "recipe" is more a set of guidleines. Go with what you know the kids like, including dressing, and they'll bring home empty containers every time!

Individual Layered Salads
Makes one
Printable Recipe

In a two cup serving container with a lid, layer:

One cup of chopped greens
Layer on desired veggies 2 Tablespoons at a time - up to 2/3 cup total or about 10 Tablespoons.

Veggies such as:

shredded carrots
chopped cucumber
frozen peas (leave them frozen and they will thaw by lunchtime)
cooked garbanzo or other beans
sliced zucchini
halved grape tomatoes
chopped celery
chopped sweet peppers
diced red onion
sliced green onion

On top of veggies add other toppings, up to 1/3 cup or about 5 Tablespoons:

2 tablespoons shredded cheese or cottage cheese
1 hard boiled egg, chopped
Turkey bacon fried crisp and crumbled or chopped
Diced salami
Diced ham or turkey
Sunflower seed kernels or other nuts

Top everything with 3 - 4 Tablespoons of their favorite dressing and you're set!

The possibilities are endless and having your children help make the salads the night before ensures a smooth morning routine and also means they're more likely to eat them.

Friday, August 23, 2013

On-The-Go Essentials Giveaway with Polly-O String Cheese

Look at this Giveaway!


9/14/2013 UPDATE - WINNER! 

Winner chosen this morning by random number generator at Random.org. All entries were number as they were received and the winning number is 3.

Congratulations, Heather Anne! I will be contacting you shortly for more information. 

THANK YOU to everyone who participated!
***********************************************************************
Let's face it, as much as moms look forward to back-to-school, it's not the easiest time of year. Mornings are scheduled tightly and if you're kids are in anything extracurricular, the rest of the day can be just as tight. We deserve some things to make our day run smoother, too - don't we? 

This is the perfect giveaway for all moms or dads who need to keep it together in a stylish and relaxed way. 
Each pack is valued at $100 and includes the following, supplied by Kraft Foods. 

·         POLLY-O/KRAFT String Cheese Gratuity Coupon (upon purchase, package includes offers over $12 in savings on family-friendly products)
·         Striped Large Tote
·         Insulated To-Go Kit
·         Clutch Water Bottle
·         13-Pocket Coupon File

I am in LOVE with this roomy tote! It's the perfect bag for my van to keep everything organized from the start of the school day until the end. We spend a lot of time in the van dropping kids to three different schools at three different times. I like to keep extra wipes, napkins, tissues, pens, pencils, crayons, umbrellas, hand sanitizer, lotion and cough drops on-hand for the school year. This tote is exactly what I need to keep everything right where I need it.

The Insulated To-Go Kit will replace my clunky old storage containers for my own dinners that I take to work almost every night of the work week. They're large, easy to close, sturdy and the insulated bags keep everything at just the right temperature until it's time to eat.

Moms are so busy running that we often forget to drink enough. Fill the Clutch Water Bottle and pop it into the tote and you'll never have an excuse NOT to drink during the day.

I don't know about everyone else, but I lose coupons all the time. Finally having them in a handy spot ensures I'll USE them and not find them 3 months after they've expired. Keep this in the tote as well and you'll be ready to save for those last-minute trips to the store to pick up forgotten items.

This year I came up with something new for the kids with Polly-O String Cheese. Polka Dot Pizza! This is so simple you don't need a recipe. Use your favorite pizza dough, sauce and round toppings and slice 6 Polly-O Mozzarella String Cheese sticks into thin rounds and top your pizza with polka dots!

You can also use a small round cutter for multi-colored peppers or slice up green olives or rounds of zucchini. Anything round goes! Isn't this totally cute?

Polka Dot Pizza Ready for the Oven

So, how do you WIN? PLEASE read instructions twice if need be! Using the #KraftPollyO hashtag, share this on your favorite social media including Facebook, Pinterest and Twitter. Come back and share a link to your post. Make sure I have a way to contact you in case you are the winner! This giveaway ends on September 13, 2013 at 11:59 PM EST.

*Kraft Foods is providing the prizes for this program at no cost to me and has provided me with a gift of equal value for review.  This program is not administered or sponsored by Kraft Foods Group or its affiliates, but solely by Cooking with Anne.

Thursday, August 22, 2013

Country Crock Casseroles - Mexican Beef and Corn Casserole and Giveaway

Taco Casserole
Taco Casserole 
UPDATE 9/19/13 - WINNER! The winner of this wonderful giveaway is luvscows! 

Runners-Up are:

AnnaZed

MaryJ
Whitney
Harmony
SusanC

 Congratulations and thank you everyone for entering! 

*****************************************************************
Are you ready for our second Country Crock Casserole and Giveaway? Here it is!

This time the casserole is Mexican Beef and Corn Casserole. I took this basic but yummy recipe and turned it into one of our family favorites, Taco Casserole. I spiced up the beef and added in layers of tortilla chips and a crunchy tortilla chip crumble to top it off. The kids really love this one!

Here is the original recipe from Country Crock:

Mexican Beef and Corn Casserole

Ingredients:

1 lb. lean ground beef
1/3 cup chopped fresh cilantro (optional)
1 can (15.5 oz.) reduced sodium black beans, drained
1 can (11 oz.) Mexicorn, drained
2 Tbsp. Country Crock Spread
1/2 cup salsa
2/3 cup fat free sour cream
1/4 cup shredded low fat cheddar cheese

Directions:

1. Preheat oven to 400°. Cook ground beef in 12-inch nonstick skillet over medium-high heat, stirring frequently, until beef is done, about 5 minutes. Remove from heat and stir in cilantro.
2. Combine black beans, corn and Country Crock Spread in an 8-inch baking dish. Top with beef mixture, spread with salsa and sour cream and sprinkle with cheese.
3. bake 20 minutes or until heated through and cheese is melted.


And here is my version (photo above):

Taco Casserole

Ingredients:

1 - 1/2 pounds ground beef
2 cloves garlic - minced
2 teaspoons Kosher salt
1 Tablespoon ground cumin
1 cup prepared salsa
1 can corn
1 can black beans
3/4 cup shredded Mexican 4 cheese blend - divided
Half of one 11 ounce bag tortilla chips - divided
2 Tablespoons Country Crock Spread
1 cup sour cream

1 cup fresh cilantro - finely chopped (about 2 Tablespoons once chopped)

Directions:

1. Preheat oven to 400°. Crush 10 tortilla chips finely (about 1 cup) and set aside.
2. Brown ground beef in a skillet over medium-high heat - drain if needed.
3. Stir in garlic, salt, cumin, salsa, corn and black beans.
4. Layer starting with tortilla chips in a 9x13 baking pan. Top chips with beef mixture and add 1/2 cup cheese. Add another layer of chips and beef.
5. Combine crushed chips with Country Crock Spread until well combined. Crumble over top of casserole and top with last 1/4 cup of cheese.
6. Bake for 20 minutes or until the casserole begins to brown on top.
7. Combine sour cream and cilantro and mix well. Spread on top of casserole and serve.


What would you do with this casserole? Make it as-is or change it up to suit your own family's tastes? Either way it fits in with easy weeknight back-to-school dinners that we mothers so covet. Give it a try today and come back to let me know what you think!

Now, here's the giveaway! Please read and reread instructions for entering. I had a winner last time that missed out because there was no clear way to get in touch. I want everyone to have an equal chance to win!

One (1) grand prize winner will receive:

o    KitchenAid Gourmet Short Turner

o    Boxed Cheese Grater

o    Oven mitt

o    Country Crock VIP Coupon (good for one free tub)

o    Recipe card- Mexican Beef & Corn Casserole

Here's what that looks like:


Five (5) runner up winners will receive:

o    Country Crock VIP Coupon (good for one free tub)

*Share on any social network including Facebook, Pinterest and Twitter using the hashtag #CountryCrockCasserole and come back to share the link here. PLEASE remember to leave a way to contact you in the event you are a winner! This event ends September 18th and 11:59 PM EST.

*Disclosure: I received product, a product coupon and stipend for extra ingredients from Country Crock for free.

Wednesday, August 21, 2013

One Last Summer Picnic with Real Seal Dairy Products

I love dairy products and so does my family so when asked to join in on the “Back to School Goodness” campaign from Real® Seal, I leapt at the chance!

With so much information these days that seems to conflict about what's good for you and what's not, it can get very confusing. Here are some of the reasons why Real® Seal dairy products are a great fit into a daily balanced diet:

The Real® Sea lets you know what you’re buying is a wholesome, natural dairy product and not an imitation or a substitute. This means the many vitamins and nutrients that are associated with cow’s milk are guaranteed with a Real® Seal product.*

Milk is an excellent source of the following essential vitamins and minerals:

Vitamin D
Calcium and Phosphorus
Riboflavin (vitamin B2)
Cyanocobalamin (vitamin B12)

Milk is a GOOD source of:

Protein
Potassium
Vitamin A
Niacin (niacin equivalents)

To learn more about Dairy Nutrition, visit the website below:
National Dairy Council

*Nutrient claims are based on 1 cup of fat-free milk, with vitamins A & D added, from the USDA National Nutrient Database for Standard Reference.

 Take a moment to "Like" RealSeal on Facebook! https://www.facebook.com/REALSealDairy

Picnic Photos! 

Kids are back to school next week and all I can think is this is our last chance to do something fun before summer ends! We decided on one last picnic before they head back to the books.

I had to take my oldest daughter to pick up transcripts for a change to a new college and I took everyone along with me. We packed a cooler with dairy-rich Real® Sea foods and parked ourselves at the perfect picnic spot.

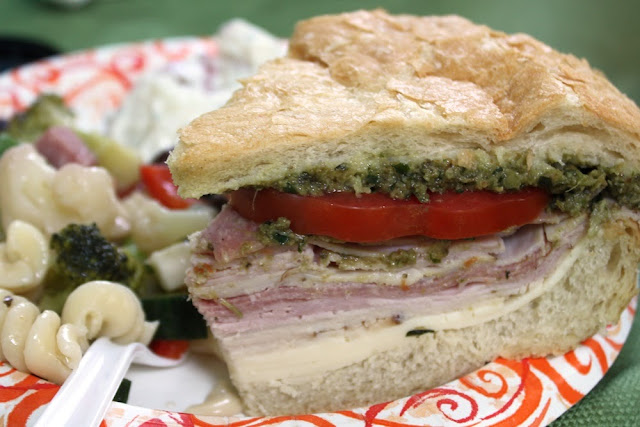
While these are our favorite picnic foods, they're also terrific for busy school nights or as lunches for the kids. To change up the Muffuletta, wrap it in foil and pop it into a 350 degree F oven for half an hour. Let it stand for 10 minutes then cut into wedges as usual. With everything warmed and the cheese wonderfully melty, it's a beautiful sandwich for cooler nights as well.

The pasta salad can get "winterized" by swapping out summer veggies for cooler weather crops. Try adding crunchy jicama or spicy radishes. Snow peas can stand in for green beans and artichoke hearts, marinated or not, are a nice addition as well. Try a sharp cheddar instead of mozzarella and cubes of ham are delicious in place of salami.

Potato salad is a summer staple, but tossing the still warm potatoes with the dressing adds a complexity you won't expect, making it perfect for chilly nights.

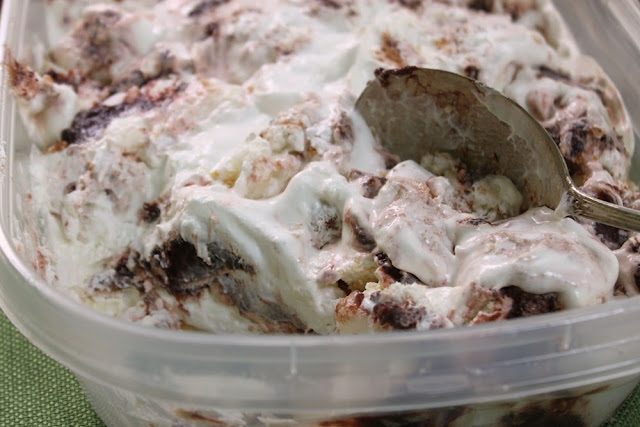
Snow dessert is delicious no matter what time of year you serve it. Wait until serving time for the fruit topping and spoon it over the top warmed. Everyone is sure to love it!

All of these are great as leftovers for lunch, so don't forget the lunchboxes the next morning - you'll have everyone packed up and ready to go in no time!

Here are recipes for our favorite picnic foods:

Muffuletta

Muffuletta
Serves 6

Our very favorite sandwich for picnics and travels. I make one without tomatoes or olives for the picky eaters.

Ingredients:

1 large round loaf of bread (traditionally Italian)
1/2 lb hard salami-sliced
1/2 lb sliced ham
1/2 lb smoked turkey
1/2 lb sliced cheese
1/2 c chopped black olives
1/2 c chopped spanish olives with pimiento
2 plum tomatoes sliced
1/2 c Italian dressing

Directions:

1. Cut loaf in half horizontally. Remove inside of bread leaving a 1" ring at edge.
2. Layer meat and cheese alternately, I usually make 2 layers.
3. Top with sliced tomato, chopped olives, and drizzle with dressing.
4. Replace top of bread and wrap tightly in plastic.
5. Refrigerate for several hours or overnight. Remove wrapping and cut into 6 wedges.


Pasta Salad


Anne's Pasta Salad
This makes a huge amount of salad perfect for potluck picnics or the like. You'll have leftovers if you don't share!

Ingredients:

1 pound rotini pasta
3 large tomatoes peeled seeded and chopped
1 large cucumber peeled seeded and chopped
2 small green peppers seeded and chopped
1 can black olives drained and sliced
2 cups cooked and cut green beans
2 cups broccoli florets cooked and drained
2 cups cauliflower florets cooked and drained
2 cups or 1 (15 oz) can kidney or small white beans-drained
1 cup shredded carrot
1/2 lb salami cut in 1/2" cubes
1/2 lb mozzarella cut in 1/2" cubes
1 large bottle (20 oz.) Italian dressing

Directions:

1. Cook pasta and drain.
2. Add remaining ingredients except dressing and toss to mix.
3. Refrigerate for several hours before serving and add dressing just before service. Stir well.


Red Potato Salad

Anne's Red Potato Salad
My favorite trick that was an accident - I ran out of mayonnaise and had to use sour cream. The result was so delicious it's the only way I make potato salad now.

Ingredients:

3 pounds red bliss potatoes (that means the small ones!) cooked and cubed
1 cup mayonnaise
1 cup sour cream
1 clove garlic, minced
1 teaspoon dried dill
1/2 small onion-finely chopped (optional)
2 teaspoons grainy brown mustard or 1 teaspoon ground mustard powder
1 Tablespoon Kosher salt (less for table salt)

Directions:

1. Combine mayo, sour cream and seasonings and blend well.
2. Pour over potatoes and toss until well combined.
3. Check seasoning and thin with a little milk if necessary.


Snow Dessert

Snow Dessert
Messy and not pretty but oh-so-good! The kids love this one.

Ingredients:

1 (10 inch) angel food cake
1 (8 ounce) package cream cheese
1 cup milk
1 (16 ounce) package frozen whipped topping, thawed
1 (21 ounce) can blueberry pie filling or other fruit filling or 2 cups pudding-any flavor
1/2 cup confectioners' sugar
1/2 teaspoon vanilla extract

Directions:

1. Break angel food cake into small pieces, and spread into the bottom of a 9 x 13 inch baking
dish.
2. Mix together confectioners' sugar, cream cheese, vanilla, and milk until smooth. Fold in whipped
topping. Pour over cake pieces.
3. Pour blueberries, other fruit, or pudding over all.
4. Cover tightly with plastic wrap and chill for 4 hours or overnight.

*Stipend for food was provided by Real® Seal. All opinions are my own and are in no way influenced by free product. 

Tuesday, August 20, 2013

Back to School with Bluebird

This is the third in a sponsored series of posts about Bluebird by American Express.

Well, we did it. Shopped for school, that is. Each year I think it's the most taxing thing I deal with. This year was actually a little easier. I have a tendency to micro-manage the kids and it can be overwhelming for all of us. With a Bluebird account, however, it was far easier with at least one child.

I set her up with her own sub-account on Bluebird and set a daily limit - which was also her back-to-school limit. I let her know how it worked, told her the dollar limit and stepped back. Not only did she get what she needed, she actually did better than usual!

Happy with her "stuff" and her Bluebird card!

This is a huge deal here. She has difficulty making choices so I expected the same as always; that she would come to me after an hour whining that she couldn't find anything within our budget. Imagine my shock as she showed up at our meeting spot with an armload of clothing she really liked.

I'm sure I could have done this in years past, but with the actual dollar limit enforced by the Bluebird account, there was no mother giving in at the last minute so my daughter could buy that one thing she just "had to have!" It was wonderful and her independence level is increasing as well.

I also used it for our first week back to school menu and kept in budget (came in under!) with it as well.

See any recipes you need? ;) Let me know!


As for me, the Bluebird account and card worked just as my bank account works, but without the extra fees. I didn't do direct deposit, but it's available, and with that there are even less fees. The mobile app keeps me connected at any moment so I can check on my own balance and my daughter's balance. If I need to deposit a check, I can snap a photo and send. Easy as that.

I honestly don't know that I'll switch over completely as I haven't had enough time yet to put it to the test as I want, but it's very possible. Overall I really like having an extra purchasing source on-hand and my favorite aspect, if you couldn't already tell, is the sub-accounts. I have one other child I'll most likely be adding an account for as well. I think it's a great learning experience for them and it takes a little bit of the shopping burden off of me.

Check out Bluebird by American Express at your local Walmart and grab a kit for $5 or sign up online for free like I did. It's fast, it's easy and it's worth it. Read up about Bluebird for yourself at the website and get started today!

Monday, August 19, 2013

Our Week in the 2013 Chevrolet Suburban

I recently spent an entire week driving all over everywhere in the most fantabulous (it is too a word) ride I've ever had the pleasure to drive: the 2013 Suburban LTZ. Very sweet.

I'll get to all the big and little reasons why I loved it so, but first I want to share photos of our foodie travels!


Click to play this Smilebox slideshow

Create your own slideshow - Powered by Smilebox
A free slideshow by Smilebox


Fun stuff, yes? Now, on to the stuff I love about this vehicle.

  1. Firstly - it's a Suburban. I love Suburbans. My dad always had one and until just recently I had one of my own; a 1990 Suburban 1500. It was 18 feet of pure beauty. Sadly, she finally met her maker and she went to the graveyard just before this Suburban came. 
  2. It's big. With 7 kids and a plethora of "stuff" to haul around from day-to-day I really appreciate the space. I do have a mini-van, but there's not enough leg room, head space or storage. The Suburban is comfortably large. I didn't hear any complaints of, "He's touching me!" or "She won't scoot over!" for the entire week we drove this.
  3. This particular model was fully loaded. The radio isn't just a radio, it's a Bose centerpoint surround sound with SiriusXM and 4 sets of wireless headphones to go with the double DVD screens in the back. Do you have ANY idea how awesome it is to have complete silence on a trip with 5 usually-loud kids? They turned on a movie and were silent until we hit our destination. Very sweet. 
  4. There's a radio! I know I just said that above, but our current van is radio-less and it's so hard for any of us to take trips even 10 minutes away without a radio. We turned it on the moment we were in and had it going until we stopped. The sound was beautiful and for those times when the kids wanted to hear something I didn't want to listen to, I was able to divert sound to the rear of the truck and spare my ears.
  5. Seats with sensors. I know this isn't new, but it's new to me. If there was nobody sitting in the passenger seat, the passenger airbag was automatically OFF. The moment someone sat there, the airbag turned ON. When the kids in the back didn't buckle in as instructed, a little light came on letting me know so. No more kids trying to trick mom.
  6. Independent air controls for driver, front passenger and rear passengers. Finally, everyone can be comfortable at the same time. Even the seats are heated and cooled. As a kid I remember grandma and grandpa going back and forth from heat to A/C. Wouldn't it be awesome if they each had their own controls? They would have loved this!
  7. Rear vision camera. OK, so this is fun - and very useful when you have kids running all over or lots of traffic or very busy parking lots. It's good to be able to really see what's going on behind you before you back up. If you get too close to anything, it alerts you as well!
  8. It's fast. I know I shouldn't be sharing this, but that thing is like a B-52 bomber ... it feels low and slow and before you know it, it gets away from you. Nobody should be speeding, but the point is, the ride is very smooth. One of my favorite things about my old Suburban was the engine power. With a a Vortec 5.3 SFI V8 320 Horsepower engine, this thing has power to spare.
  9. It's not the gas guzzler you'd expect. I got roughly the same gas mileage from this as I do from my mini-van. We put 375 miles on this in the first day and a half and I still had gas in the tank. With a 31 gallon Flexible-Fuel gas tank, it rivals most other larger vehicles and some smaller. 17 MPG average is not so bad.
  10. I've never owned or driven a brand new vehicle. Yep. Never. This was just so much fun for me and the kids, I can even begin to tell you. They miss it, I miss it. I'm glad we took a lot of photos! Also, as you can see in the photos, this came directly from the source in Michigan. I was born there and my daddy died there and we were both Suburban lovers as I said - so that was just a special little "extra" for me.
There are all sorts of technical goodies here too, but as a mom I wanted to share my own feelings about what works for a large family. I think another row of seats or a bench seat in the center rather than the two buckets would have fit my own needs better, but that's one small thing in the grand scheme.

The bottom line is, I loved this truck and if I could have my own, I'd do it in a heartbeat and not think twice! If you're looking for luxury meets family, this is the vehicle for you.

Visit the places we went to:

Burkholder Farm Market

Esh Discount Grocery

Jersey Hollow Farm LLC
Norman & Edith Sauder
276 Quarry Rd., 19530
phone: 610-683-3561
Hours: 7-9 pm weekdays; 9-5 Sat

Lancaster County

Ever Fresh Produce
Division Highway and Tobacco Road
Earl, Pa

Zook's Roadside Stand

Hayloft Candles, Ice Cream and Petting Zoo

St. Peter's Village

Shut the Door Restaurant

Farm Stand at Kreidersville Covered Bridge


*Special thanks to General Motors for supplying the Suburban, Tom Cristino of Hello Tierney for setting it all up, and Events Solutions International for drop-off and pick-up of the truck!

Thursday, August 15, 2013

Bluebird Loaded and Ready to Go


This is the second in a sponsored series of posts about Bluebird by American Express.

Now that my Bluebird account is all set up, card received and activated, money loaded and sub-account set for one child, we're ready to go!

I chose my third oldest child for the sub-account and set a daily spending limit for her. As soon as her card comes she will be ready to shop for school on her own. This gives her the freedom to choose as she wishes, but also instills a sense of responsibility in that she will have to budget herself and make wise choices.

As for me, I'll be making school purchases for the other kids as well as after-school snack goods and a list of meals and fixings for the first week back. Having this card rather than my usual is good because I've set a limit by loading only a set dollar amount to it that I will have to budget around, just like my daughter will. I'll have to make wise choices as well, in other words.

We'll be heading to Walmart to see what we can find for the first week back to school.

One of the biggest pluses for this card is one that I won't need myself, but is very useful for anyone who regularly overdraws their bank account. When you write a check using Bluebird, it must first be pre-authorized. The amount is then held from the account so that when the check is cashed, it's not possible to overdraw - therefore, no overdraft fees! I think it's a brilliant move for Bluebird.

A few other favorite aspects:

1. It's American Express. While Amex isn't as widely accepted, it is very widely known and what I believe to be a trustworthy company.

2. Mobile banking. The Bluebird mobile app has all sorts of capabilities that rival those of my own banking institution including the ability to deposit checks. I love that time-saver.

3. Sub-accounts. My kids are not very good at budgeting when it comes to using cash, so I'm really glad to have the sub-account feature so they can learn how to budget, bank and be more responsible with their money. I'll let you know how it goes!

*This series of posts is sponsored by Bluebird by American Express.

Wednesday, August 07, 2013

Spicy Pulled Pork and JalapeƱo Mayo

Spicy Pulled Pork and JalapeƱo Mayo
Spicy Pulled Pork and JalapeƱo Mayo

This is a recipe I've been working on for months. Yes, months. I made it once and then found that no matter what I did I couldn't seem to duplicate it. I was frustrated. I think I've made pulled pork 6 times in the last two months trying to get this right.

Let's step back a moment. The first time I did this it came from the slow-cooker version of Italian Beef that's been floating around for a long time. Italian dressing mix packets and a good beef roast slow cooked for hours and then made into sandwiches. I thought - what's good for the beef is good for the pork, and I was right.

However, the first time I made it was with a 3 pound pork butt and a couple jalapeƱos. It was spicy. Boy, oh boy was it spicy! It was so good I decided to do it again but on a larger scale with a full 10  pound pork shoulder. Why not?

Once it was done it shredded beautifully and it was good, but not the same. Not spicy, not as flavorful. OK, I needed to step up the dressing packets and peppers. Or maybe try something different. I tried more packets, more peppers, extra garlic, extra black pepper. No, no, no and no.

So, I went back to the drawing board. A smaller roast, a slightly different method ... and BINGO.

Here's the recipe, and pay attention to the method so you don't skip out! Also, the may was a stroke of genius. These are dainty and proper sandwiches just because the barbecue sauce is missing - no, these are messy and divine.
Perfectly Roasted ... isn't that a beautiful crust?

Spicy Pulled Pork and JalapeƱo Mayo
Printable Recipe

5 pound pork shoulder
4 medium jalapeƱos diced
3 packets Good Seasons Italian Salad Dressing and Recipe Mix - divided
2 cups water

1. Preheat oven to 325 degrees F.
2. Rinse pork and dry well. Place in a large roasting pan, fat side up.
3. Rub 2 packets of dressing mix all over pork.
4. Add jalapeƱos around roast and pour water into bottom of pan - do not pour over pork.
5. Roast for 5 hours or until fat forms a crisp crust and pork is easily shredded. Strain pan drippings well and set aside.
6. Cool until able to handle and remove excess fat and shred well.
7. Sprinkle last packet of dressing mix over pork and mix well.
8. Pour pan drippings over shredded pork and mix well.
9. Mound onto rolls and top with JalapeƱo Mayo.

JalapeƱo Mayo

1/4 cup mayonnaise
1/4 cup sour cream
1 Tablespoon minced jalapeƱo
1 Tablespoon finely chopped fresh cilantro
1 Tablespoon fresh lime juice

Combine all and let stand for 10 minutes before using for shredded pork sandwiches.