 |
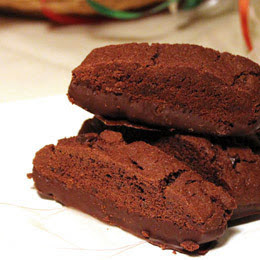
Double Chocolate Biscotti
|
Biscotti is one of those gifts that everyone loves to receive. Streamlining preparation with a boxed mix makes this faster and the results are more reliable. You can use just about any flavor of boxed cake or muffin mix and add in nuts to chocolate chips to dried fruit. The possibilities are endless and the recipients of your delicious gift will truly appreciate you.
Double Chocolate Biscotti
Hands-On Time: 15 minutes
Ready In: 1 hour 55 minutes
Yield: Makes 24 biscotti
Ingredients:
1 box (18 ounces) chocolate chocolate chip muffin mix
1 cup all-purpose flour
2 large eggs
1 stick (1/2 cup) unsalted butter - melted
1 cup semi-sweet chocolate chips or chocolate coating - melted
Directions:
1. Preheat oven to 350 degrees F. Lightly grease 2 baking sheets or cover with parchment paper.
2. Combine muffin mix and flour in a large bowl and blend well.
3. Add eggs and butter and blend until a stiff dough forms.
4. Divide dough in half and shape each half into a 12-inch roll.
5. Place rolls 2 inches apart on one of the prepared baking sheets and flatten slightly to a 2-inch width.
6. Bake for 30 minutes.
7. Remove from oven and let stand for 1 hour. After standing time cut with a serrated knife into 12 equally thick slices.
8. Lay, cut sides down, on both sheets and bake for 5 minutes longer. Turn cookies over and bake for another 5 minutes.
9. Remove from oven and cool on wire racks before dipping just the bottoms in melted chocolate. Refrigerate on waxed paper until chocolate is firm. Store in an airtight container in the refrigerator for one week. These can be frozen for up to 3 months.
 |
White Chocolate and Orange Truffles
|
White chocolate can be overly sweet, but balanced with citrus-y orange peel and coated in nuts, the edge is taken off and all that's left is pure decadence.
White Chocolate and Orange Truffles
Hands-On Time: 15 minutes
Ready In: 2 hours 15 minutes
Serves: Makes 24 truffles
Ingredients:
8 ounces white chocolate, finely chopped (do not use white coating)
1 teaspoon grated orange peel
1/4 teaspoon orange extract
1/3 cup heavy cream
powdered sugar and very finely crushed nuts to coat
Directions:
1. Heat an inch or so of water in a small saucepan to a simmer.
2. Place chopped chocolate into a heat-safe bowl and add orange zest. Pour cream and extract over chocolate and place bowl over simmering water. Make sure the bowl is large enough to rest on the saucepan without touching the water beneath.
3. Stir until melted and smooth.
4. Remove from heat and let stand for an hour at room temperature. It is necessary for the chocolate to cool at room temperature so that there is no condensation when adding the plastic wrap later on.
5. Cover the surface of properly chocolate with plastic wrap and refrigerate for one hour until well set.
6. Scoop chocolate into one-inch balls with a rounded teaspoon or melon baller. Roll immediately in powdered sugar or nuts. Refrigerate until ready to serve. These will keep for a week in the refrigerator.
 |
| Almond Cookies |
Almond Cookies
Makes about 36
Ingredients:
1/2 cup margarine, shortening or butter
1 cup granulated sugar
1 egg
1 tsp almond extract
2 1/2 cups flour
2 tsp baking powder
whole almonds for the tops
Directions:
1. Cream butter, shortening or margarine with sugar.
2. Add egg and almond and mix well.
3. Add dry ingredients - except almonds - and blend.
4. Roll into 36 balls and place on ungreased cookie sheets lined with foil or parchment.
5. Press an almond into each cookie and bake 20 minutes in a 350 degree F oven.
 |
| Grandma's Confetti Cookies |
Confetti Drops
Mrs C.L. Searfoss
Ingredients:
1 c spry (shortening)
2 c flour
6 T sugar
1/4 c milk
1 oz confetti candy (multi-colored non-pareils)
1 t vanilla or almond extract
1/4 t salt
red food coloring
powdered sugar
Directions:
1. Mix shortening and sugar and salt.
2. Add red food coloring to milk so it distributes well-enough so the dough will be a pretty pink. Add extract to milk also.
3. Add flour alternately to shortening and sugar mixture with milk.
4. Add confetti and mix well so it gets throughout the dough.
5. Roll into 1" balls and flatten slightly on greased cookie sheets.
6. Bake at 350 degrees F for 15 minutes. Do not let them brown!
7. The original recipe says to roll them in powdered sugar while warm but I always wind up with a sticky mess if I do this so I let them cool first.
 |
| Orange Gingerbread and Chocolate Chunk Cookies |
There isn't a Holiday season that goes by when we don't have gingerbread in one form or another. The kids love gingerbread men, and I adore ginger snaps. But rolled gingerbread dough is not the easiest to work with and sometimes a softer cookie is just right. Infused with orange and filled with chocolate chunks, this drop version is not only easier, but softer - and everything is better with chocolate.
Orange Gingerbread and Chocolate Chunk Cookies
Hands-On Time: 10 minutes
Ready In: 20 minutes
Serves: Makes 5 dozen cookies
Ingredients:
1 cup unsalted butter - softened
1 1/2 cups packed light brown sugar
1/2 cup dark molasses
2 large eggs
2 teaspoons orange zest
3 teaspoons milk
3 cups all-purpose flour
1 1/2 teaspoons baking soda
1/2 teaspoon salt
1 teaspoon ground cinnamon
2 teaspoons ground ginger
2 cups semi-sweet chocolate chunks
Directions:
1. Preheat oven to 350 degrees F.
2. Beat together butter, sugar and zest until fluffy.
3. Add eggs, one at a time until well combined.
4. Stir in molasses and milk.
5. Add flour, baking soda, salt and spices and stir well until a thick, smooth batter forms.
6. Stir in chocolate chunks and drop dough by rounded teaspoonfuls onto greased baking sheets, 2 inches apart.
7. Bake for 10 minutes, or until bottoms are very lightly browned - do not over bake.
8. Cool on racks.
 |
| Iced Pumpkin Cookies |
Iced Pumpkin Cookies
Hands-On Time: 10 minutes
Ready In: 25 minutes
Serves: Makes 4 dozen cookies
Ingredients:
2 cups canned pumpkin puree
1 cup granulated sugar
1 cup unpacked light brown sugar
1 cup vegetable oil
2 large eggs
4 cups all-purpose flour
1 teaspoon pumpkin pie spice
2 teaspoons baking powder
Icing:
3 ounces cream cheese - softened
1/2 teaspoon vanilla extract
4 cups powdered sugar
2 Tablespoons milk
Directions:
1. Preheat oven to 350 degrees F.
2. Blend together pumpkin, sugars, oil and eggs until smooth.
3. Stir in flour, spice and baking powder until well combined, dough will be thick.
4. Drop by rounded tablespoonfuls 2 inches apart onto greased cookie sheets. Bake for 8-10 minutes until puffy and just beginning to brown on the bottom. Cool on racks.
5. Once cool, combine cream cheese, powdered sugar, vanilla extract and milk until smooth. Ice cookies and serve.
 |
| Chocolate Chip Cookie Dough and Cheesecake Bites |
Chocolate Chip Cookie Dough and Cheesecake Bites
Prep Time 15 minutes
Cook Time 4 hours
There's no busier time of year for many moms than the winter holidays. While most of the treats I make are the baked kind, I like these because they're completely no-bake but every bit as decadent as
anything else I serve. Setting time is important, so don't skimp on the 4-hour refrigeration time - you'll be glad you waited.
Ingredients:
Cookie Dough Layer
2 cups all-purpose flour
1 cup mini semi-sweet morsels
1 cup unsalted butter, softened
1 cup light brown sugar, packed
1 teaspoon vanilla extract
Cheesecake Layer
1 cup powdered sugar
1 - 8 ounce package cream cheese - softened
1/2 cup heavy cream - whipped stiff
Chocolate Layer
2 cups semi-sweet chocolate chips or chocolate coating pieces
Directions:
1. Cream together butter, brown sugar and vanilla extract until smooth.
2. Add flour until a soft dough forms. Fold in chocolate morsels.
3. Press cookie dough layer evenly into an 8x10 pan with straight sides.
4. Blend cream cheese with powdered sugar until smooth. Fold in heavy whipped cream.
5. Spread over top of cookie dough layer and cover with plastic wrap so that wrap is not touching the cream cheese layer. Refrigerate for 2 hours.
6. Melt chocolate chips or coating until smooth and spreadable. Spread over cream cheese layer evenly and refrigerate for another 2 hours or overnight until firm. Cover with plastic wrap that is not touching the chocolate top layer.
7. Let stand at room temperature for 10 minutes before cutting with a heated and dry knife.
 |
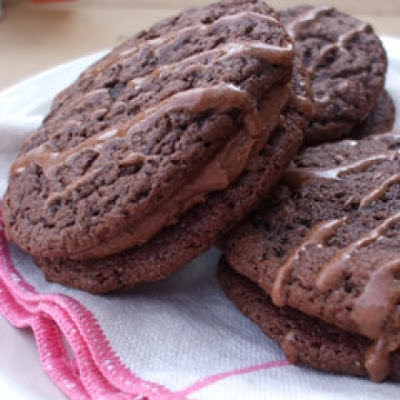
| Chewy Chocolate Cream Sandwich Cookies |
I came across cookies like these at the store recently and I wasn't willing to spend
nearly four dollars for 12 cookies. In my house, they would be gone so fast it wouldn't be worth the cost. Just across from the cookies was a seasonal baking display filled with all sorts of baking goods including cake mixes at a great sale price. I decided I could make those same cookies using my favorite cake mix cookie recipe, and I was right. The store version costs about 30 cents each and my homemade version is about 15 cents apiece.
Chewy Chocolate Cream Sandwich Cookies
Hands-On Time: 10 minutes
Ready In: 18 minutes (add cooling time)
Serves: 16
Ingredients:
1 Devil's Food cake mix (11 - 12 ounce package)
2 sticks (1 cup) margarine - divided
2 whole eggs
1/4 cup baking cocoa
2 cups powdered sugar
Directions:
1. Preheat oven to 350 degrees F.
2. Pour cake mix into a large mixing bowl.
3. Melt 1 stick of margarine and add to cake mix.
4. Lightly beat eggs and add to mix. Stir well - this will form a sticky dough.
5. Roll dough into 32 balls about 1 inch in diameter. Place 2 inches apart on ungreased
cookie sheets.
6. Bake for 8 minutes. Cool cookies completely.
7. Cream together the remaining stick of margarine, cocoa and powdered sugar. Add milk if
necessary so the filling is of spreading consistency.
8. Spread about 1 teaspoon of filling onto 16 cookies. Top with remaining cookies.
Decorate with filling thinned with a small amount of milk, if desired.
 |
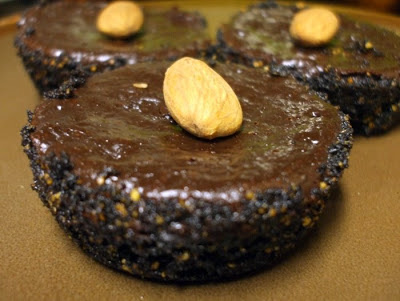
| Chocolate Crusted Chocolate Tarts |
Chocolate-Crusted Chocolate Tarts
Makes: 8 servings
Prep: 25 minutes
Bake: 25 minutes
Cool: 30 minutes
Stand: 30 minutes
Ingredients
1 recipe Chocolate-Hazelnut Tart Shells (see recipe below)
1 twelve- ounce bag semi-sweet chocolate chips
1 cup milk
1 egg, lightly beaten
Halved or chopped hazelnuts (filberts) (optional)(almonds)
Directions
1. Preheat oven to 325 degree F. Prepare Chocolate-Hazelnut Tart Shells; set aside.
2. In a medium microwave-safe bowl combine chocolate, cream, and milk. Microwave, uncovered, on 100 percent power (high) for 3 to 4 minutes or until chocolate is melted and mixture is smooth, stirring once each minutes. Stir in honey. ( Or, place chocolate in a medium-bowl. Set aside. In a small saucepan combine cream and milk. Bring to boiling. Pour over chocolate. Stir until chocolate is melted. Stir in honey.)
3. Place egg in another medium bowl. Gradually stir hot chocolate mixture into beaten egg. Pour into tart shells.
4. Bake 25 minutes. Cool slightly on wire rack for 30 minutes. Serve warm. If desired, garnish with coarsely chopped hazelnuts (filberts). Makes 12 servings.
Chocolate-Hazelnut Crust:
1. Preheat oven to 375 degree F.
2. Lightly coat 12 - 2-1/2-inch muffin cups with nonstick cooking spray; set aside.
3. In a medium bowl stir together
4. 1/2 cup melted butter,
5. 2 tablespoons sugar (omitted),
6. 1-3/4 cup crushed chocolate wafer crumbs (about 32 cookies)(I used Oreos with the filling), and
7. 2/3 cup ground hazelnuts (I had almonds on-hand and used those).
8. Press into the bottom and sides of prepared muffin cups. Bake for 5 minutes. Using the bottom of a 1/4 or 1/3 cup dry measuring cup, lightly press down bottoms of crusts. Set aside while making filling.
 |
| Cookie Dough Bites |
There isn't much better than raw cookie dough. These bites mimic the real deal without raw eggs - totally safe and totally delicious!
Cookie Dough Bites
Ingredients:
1 cup salted butter-softened
1½ cups packed light brown sugar
1 teaspoon vanilla extract
2 cups flour
6 ounces miniature chocolate chips
Directions:
1. Cream butter and sugar together.
2. Add remaining ingredients and mix well--use your hands to get it together the best.
3. Roll into 1-inch balls and place on a wax paper lined baking sheet.
4. Refrigerate until firm, about 30 minutes.
5. Dip in chocolate or drizzle with chocolate or eat as is--equally delicious no matter what!
6. Let stand at room temperature for about 10 minutes before serving
7. Store in the refrigerator.
 |
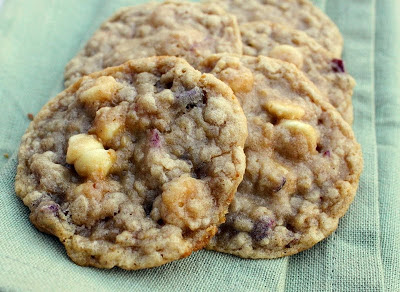
| Oatmeal Cranberry Cookies |
Oatmeal Cranberry Cookies
Preheat oven to 350º and line a cookie sheet with parchment paper (this may be reused for baking more than one batch and your cookie sheet stays clean). I mix all cookies by hand because I think it really makes a more tender dough.
1 stick margarine or butter at room temperature. If margarine make sure that it has at least 60% fat content.
1/2 cup granulated sugar
1 cup brown sugar NOT packed in a measuring cup
Cream above ingredients until well incorporated and fluffy then add and mix:
1 large egg (also at room temperature)
1/2 t. vanilla
Mix dry ingredients:
1/2 scant t. baking soda
3/4 c. all-purpose flour (Note: I made these on a humid day and needed 1 cup flour)
1 c. old fashioned oats (not instant - the ones that take about 5 minutes to cook)
Add to the 'liquid' mixture to form a fairly stiff dough.
Chop about 1/3 c. craisins (dried cranberries) and mix into the dough. There should be enough so that every cookie has a few pieces of the fruit.
Drop by rounded teaspoons on cookie sheet about 1 1/2 - 2 inches apart.
Bake for about 12 minutes until the bottom is lightly browned and you can smell the cookies ... if you time the first batch all batches will be consistently baked and not too dark.
Remove to cooling racks and cool completely. Keep well in a tin or plastic container.
 |
| Holiday Cut-Outs |
Holiday Sugar Cookies
Prep Time 10 minutes
Cook Time 10 minutes
Makes 2 dozen cookies
Ingredients:
2 cups all-purpose flour
3/4 cup granulated sugar
2/3 cup butter - softened
1/4 cup powdered sugar
1 large egg
1 1/2 teaspoons baking powder
1 teaspoon vanilla extract
1/4 teaspoon salt
Directions:
1. Heat oven to 375° F.
2. Cream together butter and sugar until light.
3. Add vanilla and egg and stir until well combined.
4. Stir in flour, baking powder and salt until a soft dough forms.
5. Shape dough into a flat disc and wrap in waxed paper or plastic wrap and refrigerate at least one hour before rolling.
6. Dust rolling surface with an equal mixture of all-purpose flour and powdered sugar. Roll dough to 1/4-inch thickness and cut into desired shapes.
7. Place cut cookies onto a baking sheet prepared with cooking spray or covered with parchment paper.
8. Decorate with colored sugar or other decorations as desired.
9. Bake for 8-10 minutes or until very lightly golden.
10. Cool on baking sheet for 2 minutes before removing to racks to cool completely.
 |
| Peanut Butter Munchies |
Peanut Butter Munchies
Makes: 32 cookies
1-1/2 cups all-purpose flour
1/2 cup unsweetened cocoa powder
1/2 teaspoon baking soda
1/2 cup butter, softened
1/2 cup granulated sugar
1/2 cup packed brown sugar
1/4 cup peanut butter
1 egg
1 tablespoon milk
1 teaspoon vanilla
3/4 cup sifted powdered sugar
1/2 cup peanut butter
2 tablespoons granulated sugar
1. Preheat oven to 350 degree F. In a medium mixing bowl stir together flour, cocoa powder, and baking soda; set aside.
2. In a large mixing bowl beat together butter, the 1/2 cup granulated sugar, brown sugar, and the 1/4 cup peanut butter with an electric mixer until combined. Add egg, milk, and vanilla; beat well. Beat in as much of the dry ingredients as you can with mixer. Stir in remaining dry ingredients by hand with a wooden spoon. Form chocolate dough into 32 balls about 1-1/4 inches in diameter. Set aside.
3. For peanut butter filling, in a medium mixing bowl combine powdered sugar and the remaining 1/2 cup peanut butter until smooth. Shape mixture into 32 (3/4-inch) balls.
4. On a work surface, slightly flatten a chocolate dough ball and top with a peanut butter ball. Shape the chocolate dough over the peanut butter filling, completely covering the filling. Roll dough into a ball. Repeat with the remaining chocolate dough and peanut butter filling balls.
5. Place balls 2 inches apart on an ungreased cookie sheet. Lightly flatten with the bottom of a glass dipped in the 2 tablespoons granulated sugar. [NOTE: I rolled mine in powdered sugar before flattening slightly]
6. Bake cookies in preheated oven for 8 minutes or until they're just set and surface is slightly cracked. Let cookies stand for 1 minute. Transfer cookies to wire racks; cool. Makes 32 cookies.
To Store: Place in layers separated by waxed paper in an airtight container; cover. Store at room temperature for up to 3 days or freeze for up to 3 months.
 |
| Raspberry and Chocolate Thumbprints |
Nothing signals the imminent holiday season like baking cookies. I don't think there is another month in the year where cookie consumption is so high. With all the varieties available, it's no wonder. My own family has many favorites, but it seems like the common thread throughout them all is chocolate. This slightly different version of the classic thumbprint is just the ticket. Not too sweet and just chocolatey enough to satisfy.
Raspberry and Chocolate Thumbprints
Prep Time 10 minutes
Cook Time 15 minutes
Makes 4 dozen cookies
Ingredients:
2 1/4 cups all-purpose flour
2 sticks (1 cup) unsalted butter
1/2 cup granulated sugar
1/3 cup chocolate morsels
1/3 cup seedless raspberry preserves
2 egg yolks
1 1/2 teaspoons baking powder
1 teaspoon vanilla extract
Directions:
1. Heat oven to 350° F and line two cookie sheets with parchment paper.
2. Cream butter and sugar together. Add yolks and blend well. Stir in vanilla.
3. Sift together flour and baking powder.
4. Add flour mixture to butter mixture and stir until a soft and pliable dough forms.
5. Roll dough into 1-inch balls and place on cookie sheets. Make an indentation in the tops of cookies with the handle of a wooden spoon or with your thumb.
6. Bake for 5 minutes and remove from oven.
7. Fill each indentation with seedless raspberry preserves -- using a baby spoon works well for this.
8. Place cookies back in the oven for 10 minutes, or until they just start to brown.
9. Remove from oven and immediately drop 2 or 3 chocolate morsels on top of each cookie. Let cool completely.
10. When cookies are cooled, dust with powdered sugar.

