Showing posts with label apples. Show all posts

Friday, August 04, 2017

Lunchbox Apple Pies

Lunchbox Apple Pies

It's closing in on school time and thoughts of packing lunches are upon us yet again. Before you purchase store bought hand pies for your child's lunch, give these a try. Not only can you choose what type of apples you really like and how much cinnamon you prefer, you totally are in control of the sugar content. Every mom likes that!

Lunchbox Apple Pies

Hands-On Time: 30 minutes
Ready In: 45 minutes
Serves: Makes 12 pies

Ingredients:

1/2 cup butter - softened
1/2 teaspoon salt
2 cups all-purpose flour
1/4 cup ice water
2 Tablespoons butter
2 cups peeled, cored and diced apples - about 2 medium
1/4 cup packed light brown sugar
1/4 teaspoon ground cinnamon
1 large egg
1 Tablespoon water
1 teaspoon granulated sugar


Directions:

1. Combine flour, salt and butter and mix together until crumbly. Add water and stir
until doiugh forms. Flatten into a disc and wrap in plastic. Set aside in the refrigerator.
2. Melt 2 Tablespoons butter in a small pan over medium-low heat. Add apples and cook
until apples soften, about 5 minutes.
3. Add brown sugar to apples and cook and stir until sugar is dissolved and any juices
from the apples begin to thicken, about 5 more minutes.
4. Remove apples from heat and stir in cinnamon.
5. Let dough stand at room temperature for 10 minutes. Roll dough to 1/8-inch thickness and cut into 12 rounds with a 4-inch biscuit cutter.
6. Place dough rounds onto greased baking sheets. Top half of each round with a
tablespoon of apple mixture. Fold opposite end of dough over apples and seal with hands
or a fork.
7. Cut a small slit in the top of each pie to vent steam.
8. Combine egg, 1 tablespoon water and granulated sugar until well blended and sugar is
dissolved.
Brush on tops of each pie.
9. Bake pies in a 375 degree F oven for 15 minutes or until golden brown and bubbly. Cool
completely before storing in the refrigerator for up to 5 days.

Tuesday, October 07, 2014

Apple Cakey Pie Thing Gooey Goodness

Apple Cakey Pie Thing Gooey Goodness

A couple weeks ago I came across a cake on a site (thanks to Mark Boxshus, A.K.A. Boscoe the Cookie Doctor) and thought it looked awesome, but there was no way it would work. I also thought it would be awesome with a topping like the one we use for Nana's Apple Cake.


I had no idea how this monster of a thing would turn out so I tried it. I tweaked it here and there and made it several times before I was happy with it. Just the photos alone on Facebook and Instagram stirred people.

When I posted to Instagram I called it: "Apple cakey pie thing gooey goodness" and SoVeryDomestic remarked, "That should really be the official name." So, I obliged and here we are. 


The first time I made it several of the kids said it was the best apple pie they ever had. It's not quite a pie, though, so we called it "pie cake". The inside seems to be almost not fully done, but it is - we struggled to find the right words for the consistency and realized it's almost like the texture you get when you let ice cream melt on your warm crumb-topped pie. It's really wonderful.


Apple Cakey Pie Thing Gooey Goodness

Apple Cakey Pie Thing Gooey Goodness
Serves 10-12
Printable Recipe

Ingredients:

Crust and topping:

2 sticks butter (1 cup) cut into small pieces
2 cups all-purpose flour
1 cup packed light brown sugar
1 teaspoon ground cinnamon


Filling:

12 small or 8 large Granny Smith apples - peeled and thinly sliced
1/2 cup packed light brown sugar
1/2 teaspoon ground cinnamon

Cake:

1/3 cup butter
1/2 cup white sugar
1 egg
1/2 cup milk
1 teaspoon vanilla extract
1 cup flour
1 teaspoon baking powder

Directions:
Preheat oven to 350 degrees F

1. Combine crust and topping ingredients: Stir together flour, sugar and cinnamon - rub into butter until crumbly. Set aside 1/3 of this and press the rest into a 10-inch springform pan. Cover the bottom and press part way up the sides - about 1/2 an inch up.

2. Combine apples and brown sugar with cinnamon. Toss well to coat. Pour into crust. This should come up to the top and possibly slightly over.

3. Stir together cake ingredients: Melt butter and stir in sugar and vanilla. Add milk and egg and blend well. Stir in flour and baking powder. Pour over top of apples and tap to help it cover over the apples well.

4. Crumble the rest of the topping across the cake and set on a baking sheet.

5. Bake for 1 hour and 20 minutes or until browned on top and bubbly at the edge.

6. Let cool well (about an hour) and run a knife around the edge. Slice now if you wish or remove ring and cut into 10-12 pieces.

Thursday, October 02, 2014

Apple Season

Bag of Apples
Apples from friends are the best!

It's no surprise to anyone I know that fall is my favorite time of year. There are so many reasons why, but one of the biggest is that it's prime time for apples. I have my favorites there, as well; Granny Smith or Pink Lady for eating, and a mix of Granny Smith and Macintosh for baking and cooking. Just this month I was introduced to SweeTango apples and fell in love with those, too.

I also get into the kitchen more in autumn, with apples ripe for the picking, pumpkins abound and meats being smoked for preserving ... it just makes me want to cook - and eat! This year (and at least one year past) I had a friend who picked apples from another friend's tree and dropped off what felt like about 40 pounds of apples. It was one packed bag. One look in that bag and I knew I'd be in the kitchen for days creating wonderful things.


Processing Apples
Processing apples for applesauce.

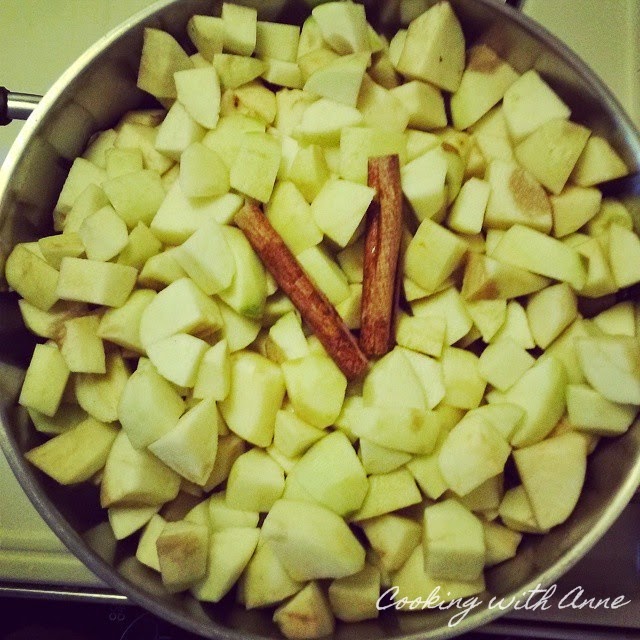
The first thing we did was process a bunch for applesauce  - I think we ended up with a gallon! It's so easy, just peel, core and chop, add a little water, sugar and cinnamon to taste and cook until mushy. I run mine through a food mill, but you can also put them in a food processor and pulse until it's the consistency you like. Mine doesn't last so long here, so I simply refrigerate until it's eaten up. You can surely can it and here are some great directions for that: Canning Applesauce.


Making Applesauce
Apples ready to cook into applesauce.

The next thing I did was process apples for pie filling, which is then put in the freezer to use at a later date. With a 60 hour work week and 7 kids, I need all the time I can get and freezing foods helps me so much in that department.

Freezer Pie Filling
Apple Pie Filling ready for the freezer.

This is very simple. Start with your favorite pie apple - I like Granny Smith or a mixture of Granny Smith and Macintosh - about 5 or 6 large apples will make an 8-inch pie. I used 15 - 20 medium apples and had enough for 3 pies. These apples were tart, so I added a little more sugar than usual to them, some cinnamon and a bit of flour to help thicken as they bake and also to help soak up some of the juices that are inevitable from thawing frozen apples. I tossed every thing with my hands and then divided it into labeled bags (label them before you fill them to make that step easier) - about 3 cups of filling per bag. Into the freezer they went and when I need one I'll remove it ahead of time and let thaw in the refrigerator overnight. Voila!

Freezer Apple Pie Filling
Thawed filling in pie crust.


You can cook this and cool before freezing or cook once thawed (see directions). You can also thaw and dump into crusts and bake! I've found just about any way works. This is perfect for nights when I really want a pie but don't want to do all that peeling. You can also make pie dough ahead of time, shape into discs and freeze as well until you need it!

Apple Pie Filling for the Freezer
Makes 1 pie

Ingredients:

5 or 6 large apples such as Granny Smith or a mixture of apples
1/2 to 3/4 cup brown sugar as needed for sweetness
1 teaspoon ground cinnamon
1/4 cup all-purpose flour
1 teaspoon fresh lemon juice - optional

Directions:

1. Label a gallon-size freezer bag for Apple Pie Filling and date. Set aside.
2. Peel and core apples and sliced to desired thickness - we like thin apples here.
3. Place slices in a large bowl and add sugar, cinnamon, flour and lemon juice if using - mix with hands until well combined.
4. Pour into a freezer bag and remove excess air. Freeze and use within 6 months.
5. You can also cook the filling at this time and freeze once cooled.
6. Once thawed, cook the filling until apples are tender and sauce is thickened. Cool, add to pie crusts and bake as usual.


Sunday, November 23, 2008

Apple Napoleons with Dulce de Leche


This past week's Top Chef challenge was to come up with "New American" cuisine to be served at Tom Colicchio's Craft restaurant in NYC. There seemed to be some confusion as to just what New American may mean, but my personal feeling is that New American is more fusion than anything else.

America has become such a melting pot (wasn't it always, though?) and expressing that through food really shouldn't be so complicated. I admit to patting myself on the back when Rhadika's dessert wontons were well-received, because I had just done similar a few weeks ago at Family.com, sans the mousse. While Carla's apple dessert was obviously well-liked, I can't help but think I'd have done it differently.

What would I have done? Well, I think the French Napoleon crossed with the classic American apple pie and a Mexican dulce de leche would be about perfect - and I have to say, they were!

Apple Napoleons with Dulce de Leche
Makes 6 pastries
Printable Recipe

2 sheets puff pastry cut into 3 inch squares - 18 total
4 tablespoons unsalted butter
4 large apples peeled, cored and sliced thinly
2 tablespoons dark brown sugar
1/2 teaspoon ground cinnamon
1 cup dulce de leche
1 cup heavy cream
1 tablespoon powdered sugar

Bake pastry squares according to package directions until golden brown. Set aside.
Melt butter in a skillet and add apples, brown sugar and cinnamon. Cook until apples are soft and lightly caramelized - about 10 minutes. Heat dulce de leche and keep warm. Add powdered sugar to cream and beat until stiff peaks form.

Lay out 6 pastry squares and top each with whipped cream, apples and dulce de leche. Repeat a second layer for each. Top each with a pastry square, whipped cream and a sprinkling of cinnamon.

Gourmet Dipped Apples


Have you seen these? They are offered on every upscale gourmet website and in every posh overpriced catalog imaginable. The average price for these beauties is $10 each. I am of the, "Why buy it when you can make it?" camp and I can imagine that my Scottish ancestors would rise up and haunt me if I actually paid for one.

I knew I could do it, and so I did - and I only paid $2.50 for each one. If I don't go into business for myself, I think these would make lovely gifts this Christmas, and I may just give a few away.

I've made them with homemade caramel and wrapped caramels and covered in nuts or sprinkles. I even made a design with nut halves and dragees on one. I think they're pretty no matter how you make them and they disappear so quickly there's no doubt about how delicious they are.


Caramel and Chocolate Dipped Apples
Makes 2
Printable Recipe

2 very large Fuji or Granny Smith (I prefer these) apples - washed, dried and at room temperature
1/2 pound dark chocolate coating
1/2 cup finely chopped unsalted nuts or small candy sprinkles

Caramel:

1 cup heavy cream
4 ounces (1/2 stick) butter
1 cup dark brown sugar

OR

40 wrapped caramels melted smooth in the microwave

Mix all three together well in a heavy bottomed saucepan. Clip on a candy thermometer and cook over low heat, stirring very often, until the temperature reaches the 'soft ball' stage - or 235 degrees F. Remove from heat and stir continuously for several minutes until the caramel beings to cool and thicken.

Dip each apple - using the stem - into the caramel as far as it will go. Use a spoon to cover the top half of the apple, making sure it is well coated and there are no bare spots. Set on parchment or waxed paper to cool. Dip other apple likewise.

When they caramel is set, it's time to dip in chocolate.

Melt dark chocolate over a double boiler or in the microwave. When fully melted, dip each apple the same way they were dipped for the caramel, coating all sides well.

As soon as they are dipped, roll to coat in 1/2 cup chopped nuts or sprinkles. Let stand in a cold spot until well set. Keep refrigerated until ready to eat and consume within one week of dipping.

Thursday, October 02, 2008

What's in the Bag?


That's a big bag.


That's a LOT of apples!


One of the perfect pies that were made.


Anne's Apple Pie
Not Mom's, but still good.
Printable Recipe

1 recipe double crust pie dough
5-6 large apples, peeled, cored and sliced

Mix together:

1/2 c sugar
1 teaspoon ground cinnamon
1/2 teaspoon nutmeg (I really prefer freshly grated)

1-2 Tablespoons flour

Place bottom pie crust into a 9" pie pan and sprinkle evenly with the flour. Put half of the apples in the pan and sprinkle with half of the sugar and spice mixture. Top with remaining apples and sugar. Top with crust, crimp edges and vent-I like to use a small star shaped cookie cutter and then replace the cut out dough offset slightly on top of the opening

Bake at 350 degrees F for 45-50 minutes until apples are soft and crust is golden brown.

Double Crust Pie Dough

3 c flour
1 c shortening
salt-I use about 1/2 teaspoon
6-7 Tablespoons ice water
Mix flour and salt. Cut in shortening until it resembles coarse meal or small peas. Add water a tablespoon at a time until dough forms well. Let stand 10 minutes under an overturned bowl before rolling to desired thickness.

Wednesday, September 10, 2008

Veggie Wednesday: The Forbidden Fruit

Apple season is one of my favorites and this is one of my favorite recipes to go with it, Nana's Apple Cake.

A bowl filled with the promise of good things to come.


Sliced apples in a 9x13 baking pan.


Butter cubed to help it soften quicker.

Sugar added.

Sugar and butter creamed together and eggs added to the mix.


Flour and baking powder tossed in.
A soft dough. Take note of the old silver fork - that's a must for mixing! Well, maybe not a must, but it works for me.

Sugar with freshly ground nutmeg (the only way I use it) and cinnamon.


Apples sprinkled with the cinnamon-nutmeg sugar.

Spoons of dough tops the apples.


Play 'connect-the-dots' and spread them over the apples. Even if it doesn't look like it will cover them all, or there are holes, don't you worry - it will bake together and be perfect. Top with more cinnamon-nutmeg sugar and...


Surprise! The final result and full recipe are at Spoonful.com.

Thursday, June 19, 2008

Taffy Apple Cheesecake Pie

Taffy Apple Cheesecake Pie


This was a winning recipe in the Pillsbury 36th Annual Bake-Off of 1994 made by Mary Ann Sasso of Franklin Park, Illinois. I made it way back then and several times since. I don't do it too often because it is rather time-consuming for a pie and there are a lot of ingredients. I wanted to post it anyway with photos so that maybe someone else will see it as not-too-difficult and give it a try.


Melting butter with brown sugar - my kind of multi-tasking.


Adding sliced apples.

Apples cooked until tender and slightly caramelized.
Cream cheese and brown sugar.

Half of the caramel mixture added to the cream cheese mixture.
Half of the caramel mixture added to the apples.
Pecans and chocolate chips. I know the recipe calls for 'finely chopped chocolate chips', but to me that's like trying to stab a Super-ball without holding it down.
Apples in the pie crust.
Topped with chocolate chips and pecans.
Topped with cream cheese mixture before sending off to the oven.


'Decorated'.

Taffy-Apple Cheesecake Pie
Serves 8-10
Printable Recipe

Ingredients:

Filling:

2 tablespoons butter, or margarine
1/2 cup brown sugar, light, firmly packed
4 medium apples, cored, thinly sliced, about 5 cups
21 caramels, unwrapped
1/4 cup cream, half and half
8 ounces cream cheese, softened
1/2 cup brown sugar, light, firmly packed
1/2 teaspoon pumpkin pie spice
1 1/2 teaspoons vanilla extract
1 egg

Crust
Single pie crust


Topping:
1/2 cup milk chocolate chips, finely chopped
3/4 cup pecans, finely chopped

Garnish:
8 ounces whipped topping
1 teaspoon pumpkin pie spice


Directions:

In a skillet over medium-high heat, melt butter and 1/2 cup brown sugar stirring constantly.

Add apples; cook and stir 12 to 15 minutes or until apples are
caramel in color and tender.

Set aside.

Drain if necessary.

In top of double boiler or in medium heavy saucepan over low
heat, melt caramels with half-and-half until mixture is smooth,
stirring frequently.

Keep warm.

In small bowl, beat cream cheese and 1/2 cup brown sugar
until light and fluffy.

Add 1/2 teaspoon pumpkin pie spice, vanilla and egg; beat
until blended.

Prepare pie crust according to package directions for one-
crust filled pie using 10-inch deep dish pie pan or 9-inch
springform pan (refrigerate remaining crust for a later use).

Heat oven to 375 degrees F.

Fold half of caramel mixture into cream cheese mixture.

Add apple mixture to remaining caramel mixture; mix well.

Spoon apple caramel mixture into crust-lined pan.

In small bowl, combine topping ingredients; reserve 2
tablespoons mixture.

Sprinkle remaining mixture over apple mixture.

Top with caramel cream cheese mixture, Bake at 375 degrees F for 35 to 45 minutes or until deep golden brown and filling is set.

Cool completely.

Refrigerate 30 minutes or until cold.

Fold 1 teaspoon pumpkin pie spice into whipped topping.

Pipe or spoon mixture onto pie; sprinkle with reserved 2
tablespoons topping.

Store in refrigerator.

Tip: to prepare caramel filling in microwave, in small microwave
-safe bowl, combine caramels and half-and-half.

Microwave on HIGH for 1 1/2 to 2 minute stirring once halfway
through cooking.

Stir until smooth.

Saturday, January 19, 2008

Apple, Pear and Almond Crostata


Crostata is yet another food that has many, many versions. The traditional "home" made crostata is simply pie dough topped with jam and sometimes a lattice of dough. Other versions, like this one, are made with whole fruit like apples or berries. Some use almond paste as a base under the fruit. I made this last evening to go with on of our favorite dinners of pasta with marinara and meatballs and my own cheese bread. Delicious!

Apple, Pear and Almond Crostata
Printable Recipe


Dough:
1 cup flour
1 T sugar
1/4 t salt
1 stick butter - diced
2 - 3 T ice water

Stir flour, sugar and salt together well. Add butter and rub together until crumbly. Add water 1 T at a time until dough forms a firm ball. Flatten and chill between waxed paper while prepping fruit.

Filling ingredients


Filling:

2 medium apples
2 medium pears
1/2 c sliced almonds
1/4 c sugar
1/4 t freshly grated nutmeg
1/4 t ground cinnamon

Peel and seed fruits-cut into small dice. Toss with sugar and spices.

Roll out dough between waxed paper to roughly a 12 - 14" round. Transfer to a lightly greased baking sheet. Top the center of the dough with fruit and sugar and toss almonds over the top, leaving a one and a half inch edge. Fold edge over, making a rustic looking tart.


Bake in a 400 degree F oven for 30-35 minutes or until golden brown and fruit is tender. Top with confectioner's sugar or chocolate sauce.

The delicious finished product!