 |
| Snowman Cookies |
When it comes to making cookies, it's nothing I'm so fond of. I've explained reasons for this before, so I'll just stick to what I like about these particular cookies. They're easy.
I don't have the best hand for decorating cookies or cakes or the like, so if I'm going to do it at all, it needs to be simple. Likewise, if I'm making cut cookies, I don't appreciate the type that need to be pried from the cookie sheet in tiny measures so parts don't break off ... like antlers or legs etc. Round cookies are good. Round cookies don't have odd edges or take excessive time to cut out and transfer from counter to cookie sheet to racks.
I first started making these several years ago and the kids really loved them. The design is simple and the cookies are delicious (who doesn't love a good butter cookie?) and they take almost no time to decorate and still turn out looking good. My kind of cookie.
First, the cookie itself. This is a nice butter cookie recipe that rolls well and bakes quickly. When rolling I always use a combination of half flour and half confectioners' sugar. There's nothing like biting into a cookie that tastes of too much flour from the rolling process. Keep the dough you're not rolling in the refrigerator until you need it and work quickly so the dough doesn't get too warm when you are rolling.
Butter Cookies for Rolling
Makes 24 cookies that are 3 inches in diameter
1 cup butter - softened
1 cup granulated sugar
1 large egg
1 Tablespoon vanilla extract
2 1/4 to 2 1/2 cups flour
1 teaspoon baking powder
Icing:
1 cup powdered sugar
4 teaspoons milk (or more if needed)
Orange and black food coloring paste or drops
1. Cream together butter and sugar until fluffy.
2. Add egg and vanilla and mix well.
3. Add flour and baking powder in small amounts until well incorporated. This makes a stiff dough.
4. Divide dough in half and flatten into a disc. Wrap in plastic and refrigerate for 2 hours.
5. Dust a board or other surface with flour and powdered sugar and roll dough to 1/4" thick.
6. Cut 12 rounds of dough, re-rolling as needed and place rounds on a greased baking sheet. I use a 3" biscuit cutter for this that works perfectly.
7. Bake at 375 degrees F for 12-15 minutes or until edges of cookies just begin to brown.
8. Cool for 2 minutes before removing to racks to cool completely.
Make Icing:
Combine powdered sugar and milk until smooth. Divide into 3 portions, white being the largest, and add food coloring to 2 parts making one black and one orange. keep covered until ready to use as it will dry out quickly.
Now to decorate!
 |
| Cooled Cookies |
 |
| Three Icing Colors |
 |
| Drop icing in the center of each cookie with a spoon. It will start to spread. |
 |
| Finish spreading with a knife to near the edge. The icing will spread a bit more once spread with the knife, so leave a small edge. |
 |
| Let this dry for 15 minutes before applying the colored icing. |
 |
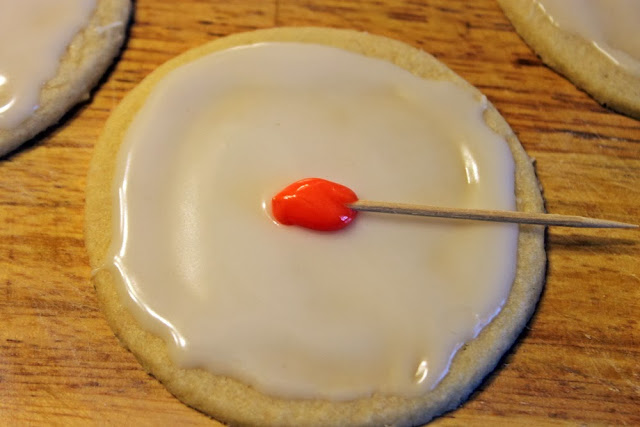
| Use a toothpick to add the nose. Put some in the center of the cookie and pull gently to the side to create a pointy nose. |
 |
| "Carrot" nose! |
 |
| Add eyes and smile with a toothpick as well. Be careful not to let it drip where you don't want it. |
 |
| You can also make them look a bit more like "The Snowman" Cute! |
 |
| Adorable and easy finished snowman cookies. Don't make these too far ahead of time or the icing will "bleed" and not look so pretty anymore. |


No comments:
Post a Comment